
How to Edit Routes
EasyRoutes provides a number of different ways to edit the routes you've created to suit your delivery workflows. For resources related to editing individual stops on routes, see the related articles linked in each section of this page.
All created routes can be found from the Routes tab of the EasyRoutes sidebar navigation menu.
From here, click into any route listed to view it and edit its configuration. Starting from the top of the Route page, you can:
- Edit the name of your route using the pencil icon next to the existing route name
- Access the Add orders tab to add any additional orders to the route
- Change the route's scheduled start date or time
- Update the assigned driver for this route:

Below the map, you'll find three menus with additional route controls:
- Actions menu (three dots icon): Contains controls for exporting, downloading & archiving a route; viewing a route's orders in the Shopify Orders page, or as a stop sequence in Google Maps; as well as updating and refreshing a route's data:

- Edit menu: Contains controls for editing route options, updating route tags and route notes, reversing the route's stop order, or re-optimizing the route:

- Add menu: Contains controls for adding orders, custom stops, or driver breaks to the route, as well as quick access to stop details stored in the address book:

- Use the handles on the left of each stop, or the stop timeline above the stop list, to drag-and-drop stops and re-order them within a route:

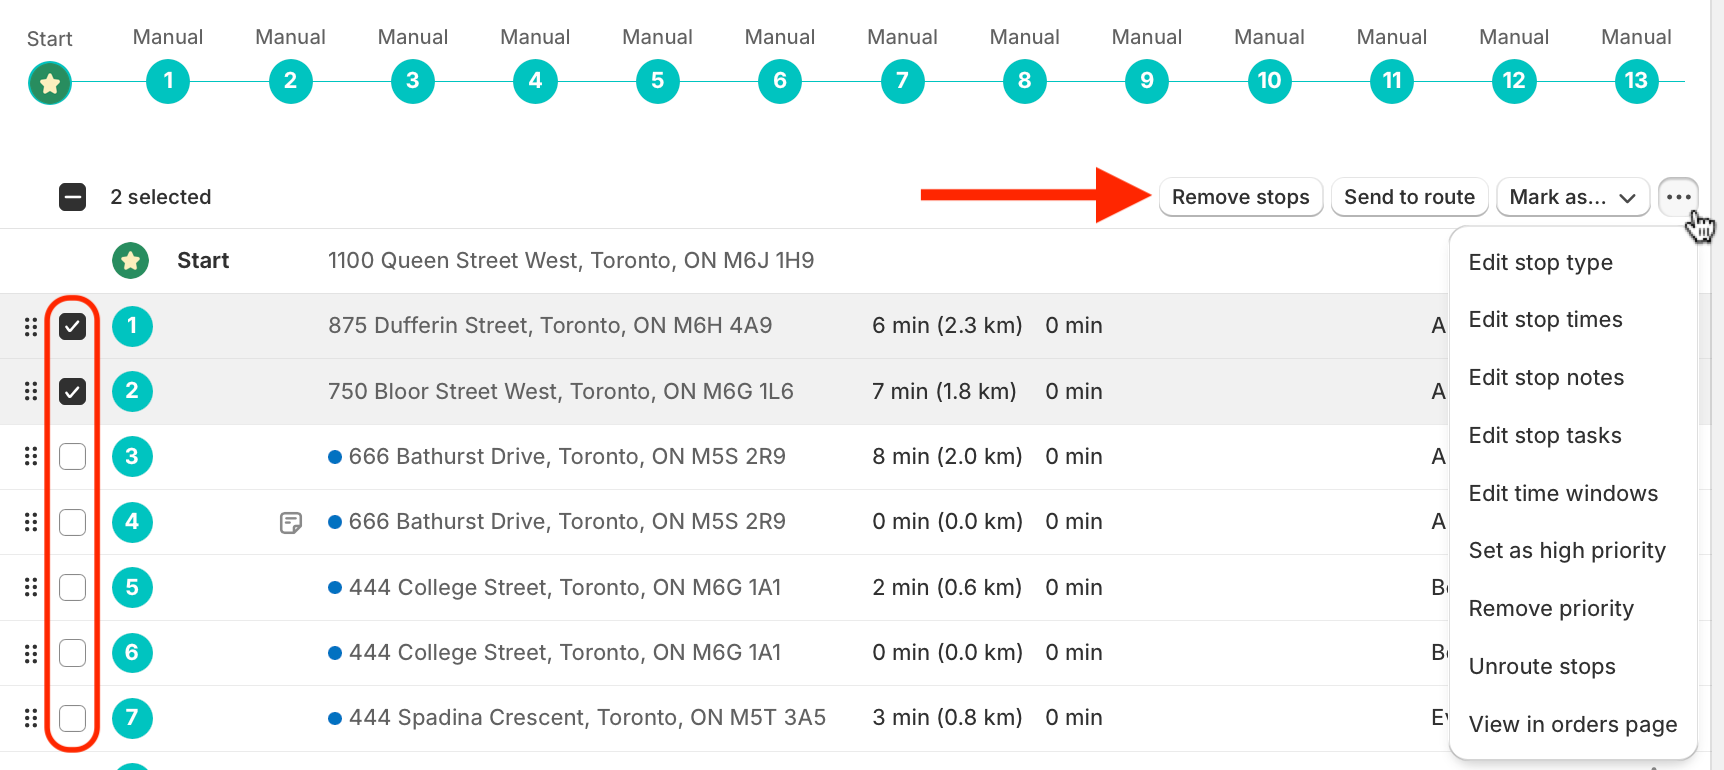
- Use the checkboxes to select multiple stops - this will pop up a menu in the upper right-hand corner of the table where you can send those stops to another route, move them to the unrouted tab, or remove them from the current route; edit stop times, tasks, notes, & time windows or change all selected stops' priority status; or apply a new 'Mark as...' delivery status to all selected stops:
- Access the Actions menu (three dots icon) on the right of each stop to access settings for a single stop, including to Edit or Remove the stop, mark it as Priority, send it to another route, and more:

After making any edits, be sure to click the Save button at the top of the page to apply them.