
How do I add a custom stop to a route?
EasyRoutes allows you to add custom stops to any of your routes for maximum flexibility when planning delivery routes.
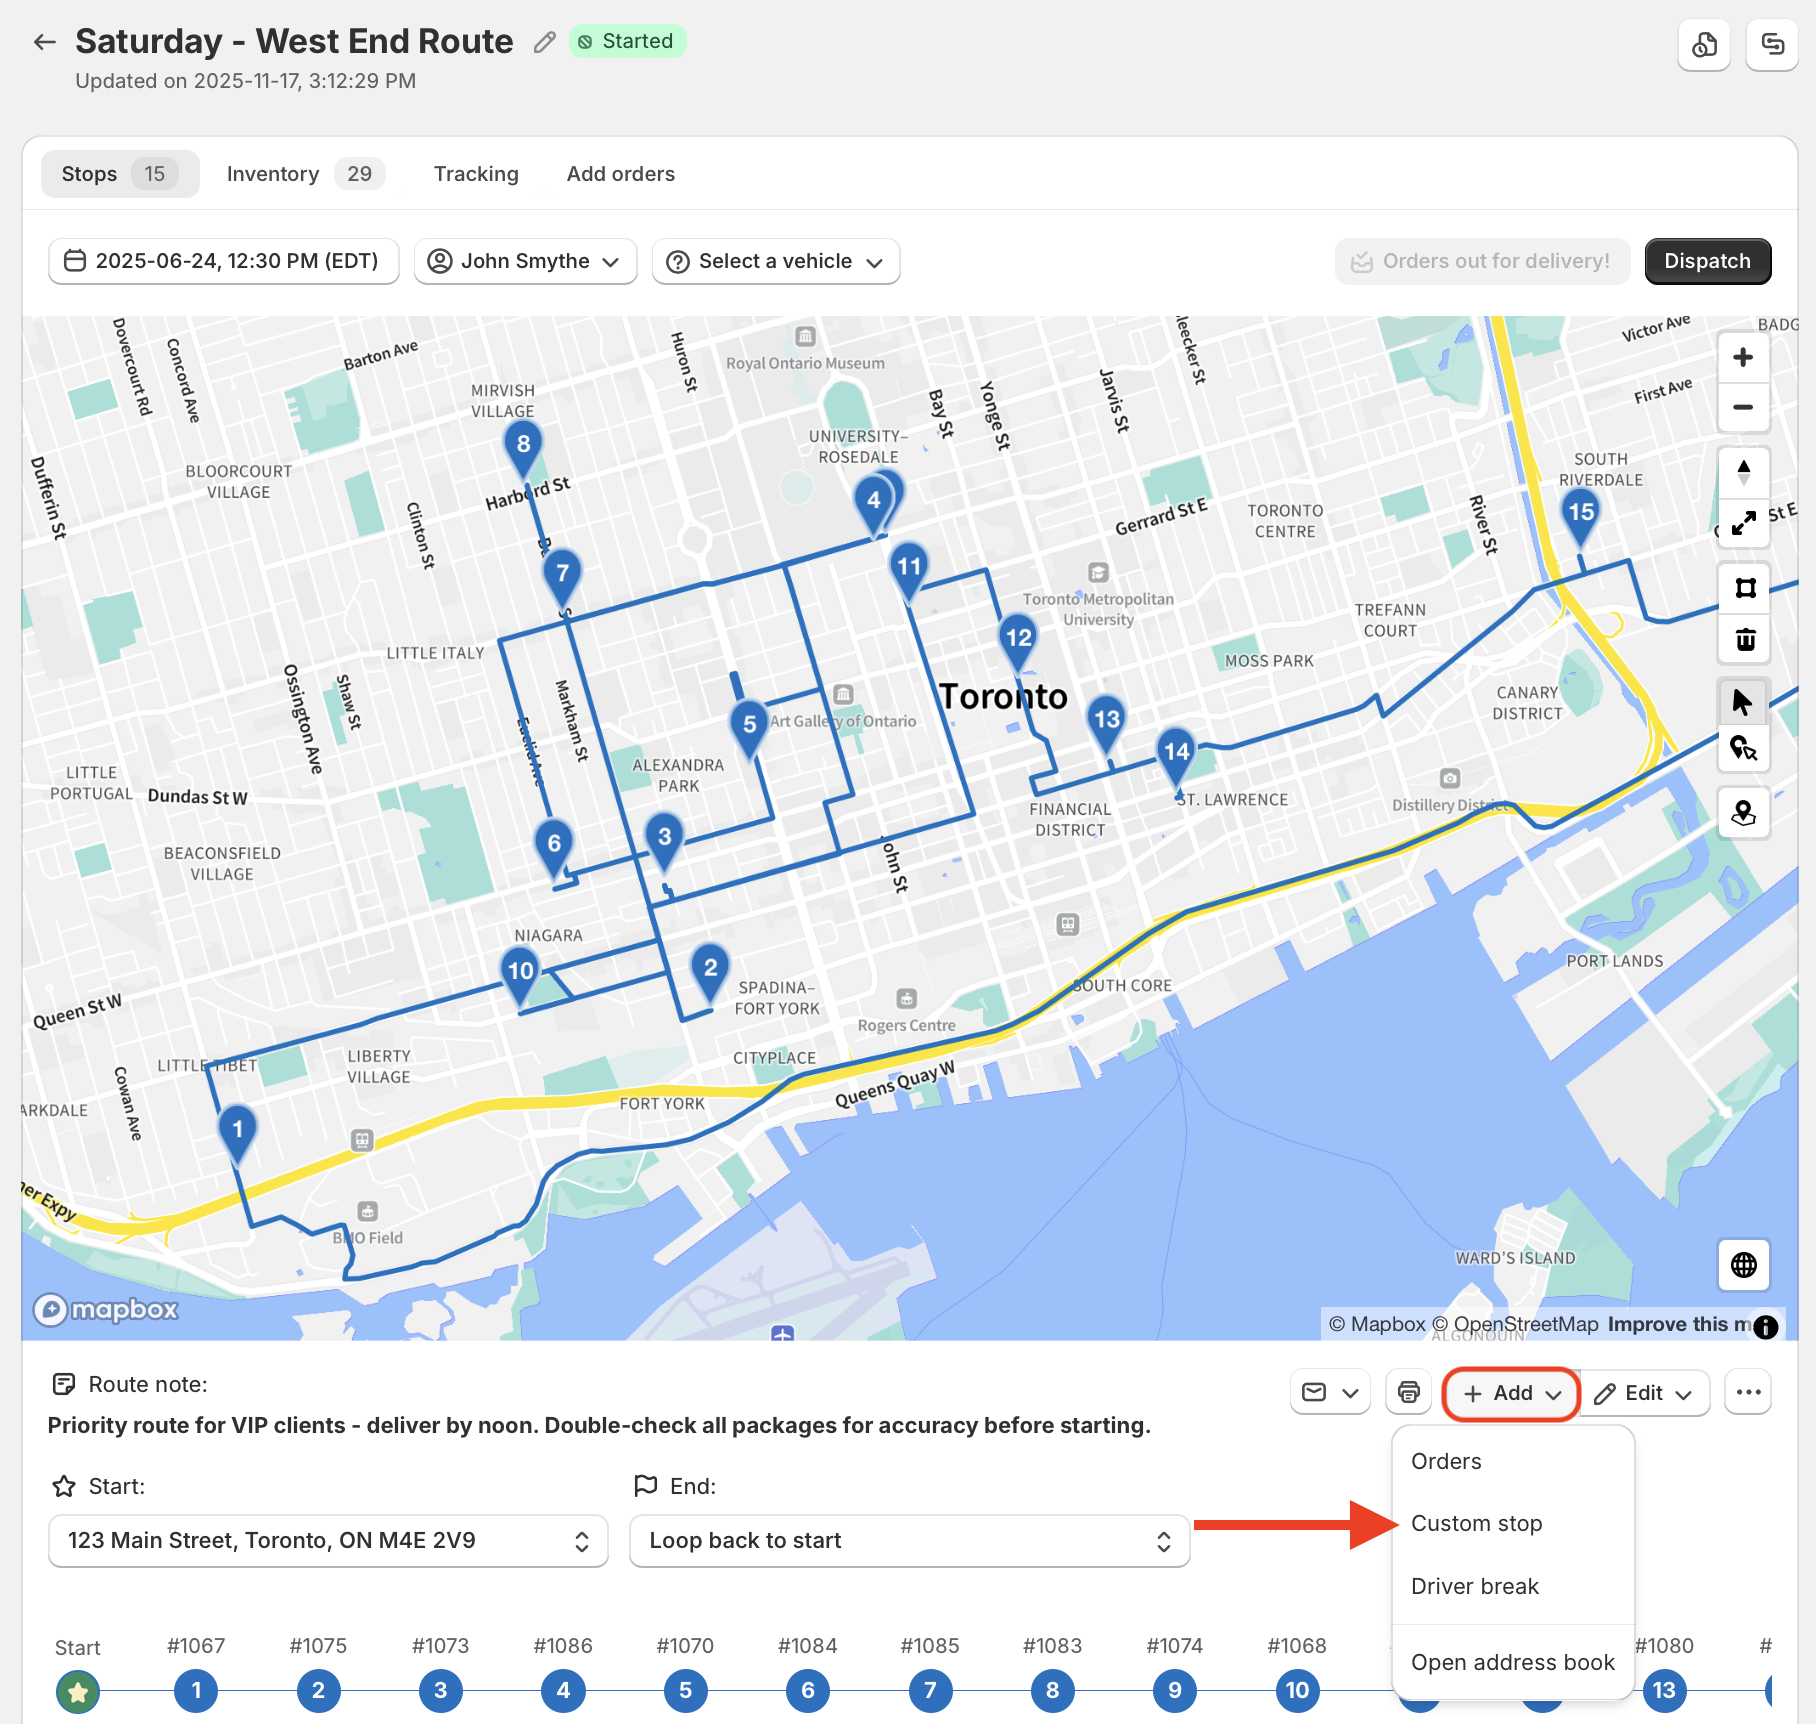
Click on the + Add button located underneath the map, and and select Custom stop:
Fill out the Stop information form below the map, ensuring a valid address is entered. EasyRoutes will attempt to search for and auto-fill any customers/addresses that are saved in your Address Book (more on this below). These saved addresses (represented by the book icon) will appear alongside any geocoding suggestions (represented by the pin icon) when typing values into the First name, Last name, Company, or Address fields:

If the address you're using is not currently stored in your Address Book and you'd like to re-use its details later, check the Save to address book box before saving the new stop:

Once the form is complete, click the Save button in the top navigation bar to add it to your route. Click the Save button in the top navigation bar again to save this change to your route.
Address Book:
If there are custom stops that you deliver to frequently, or anticipate delivering to again in the future, the Address Book feature allows you to save a stop's customer, address, and contact details, as well as time window, stop time, and stop note preferences.
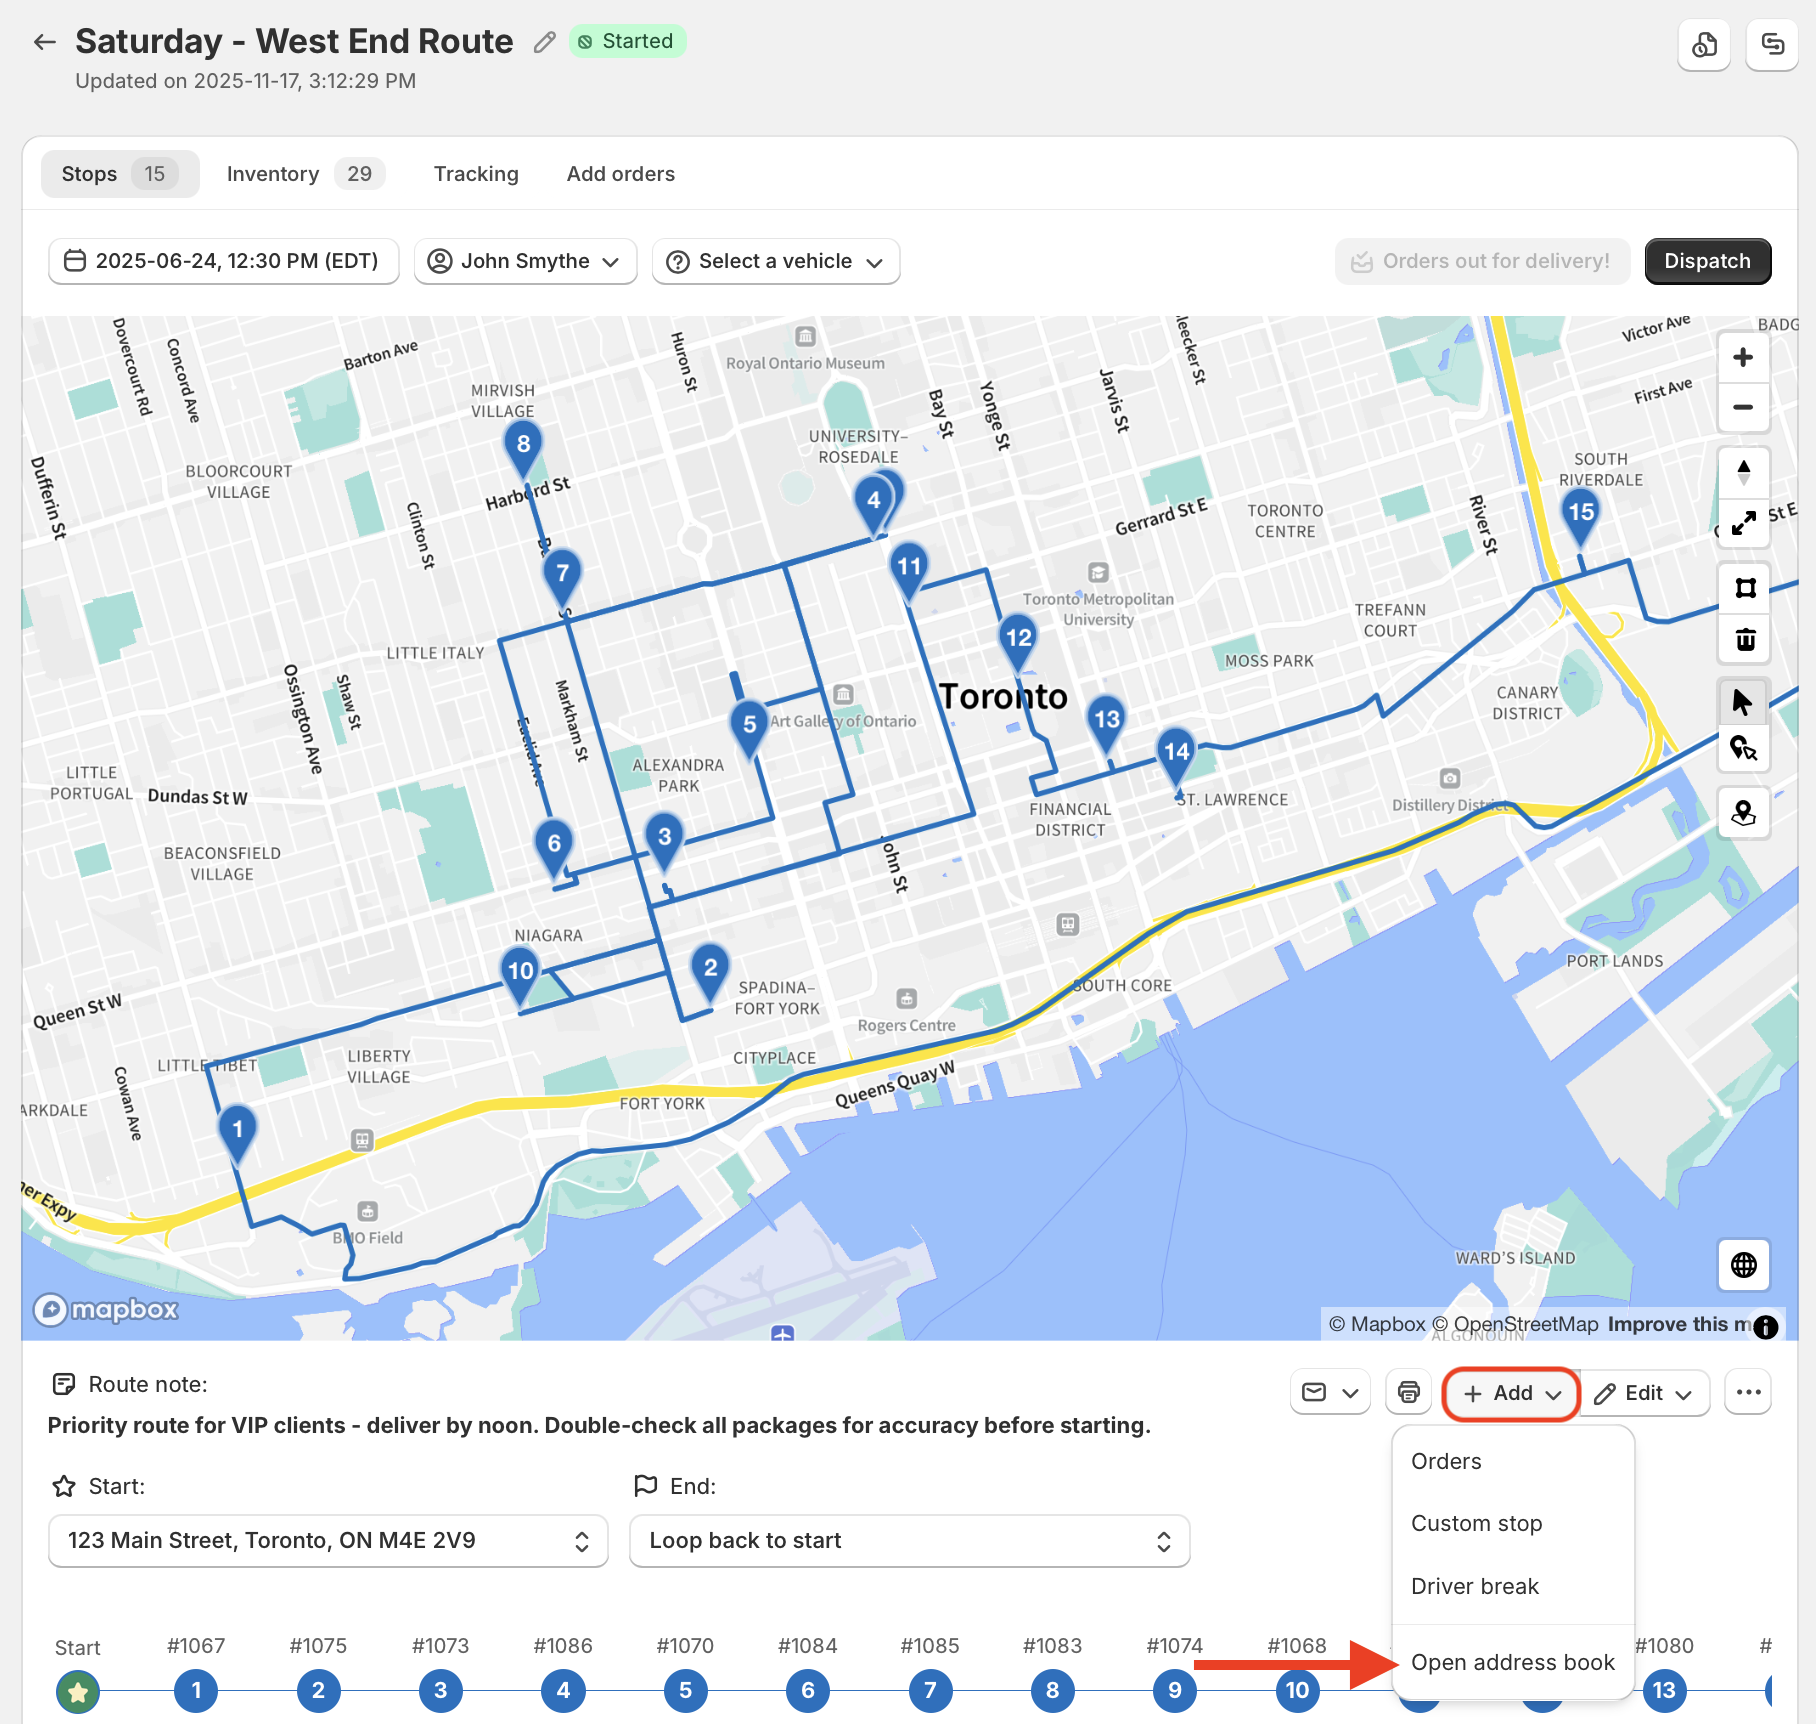
When viewing any already created route, access the + Add menu below the map, and select Open address book:
Within the address book dialog, you can manually add entries using the New address button:

- Use the checkboxes on the left-hand side of any entry to select stops. Click "Add" once you've selected all required entries and they will be added as pins to the map.
- Frequently used entries can be pinned to the top of the address book by clicking the star icon to the left of any entry's name.
- To edit the details of any entry, click the Actions (three dots icon) button on the right-hand side of the entry, and select Edit address. Click "Update" once you're finished making changes.
Stops that have already been added to a route can also be edited/updated to replace certain stop details with those saved in the address book - for example, to include a preferred geolocation or stop note based on previous experience delivering to a specific customer:
- From any route page, access the Edit stop menu for the stop you'd like to update from the additional actions (three dots icon) menu as shown below:

- From the Stop information panel, you can:
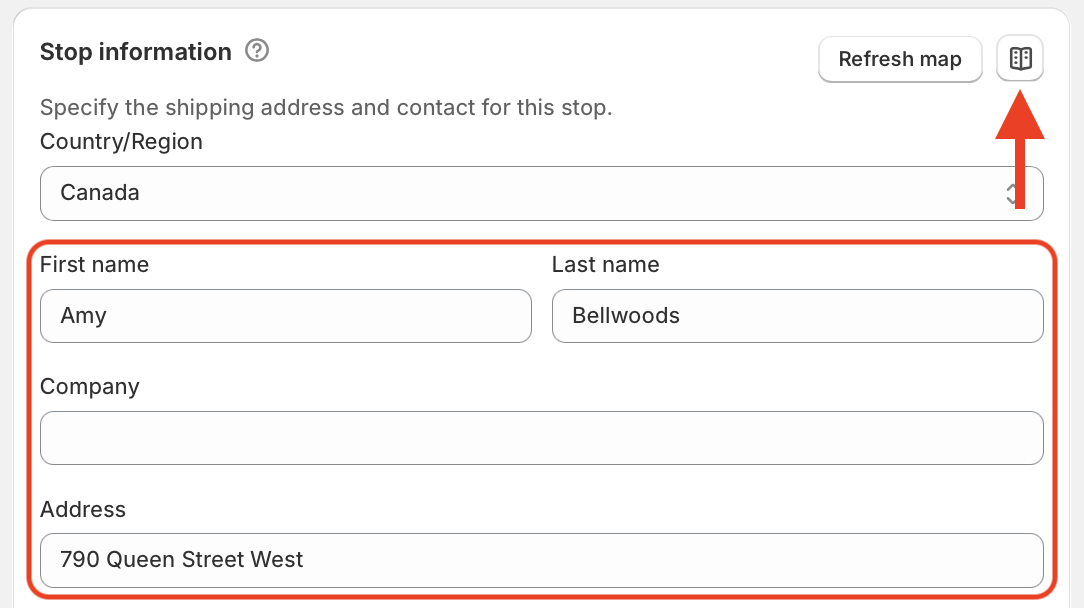
- Click the book icon in the upper right to select from a list of addresses saved in your Address Book;
- Start typing into the First name, Last name, Company or Address fields - EasyRoutes will search your Address Book and provide a list of matching entries for one-click replacement:
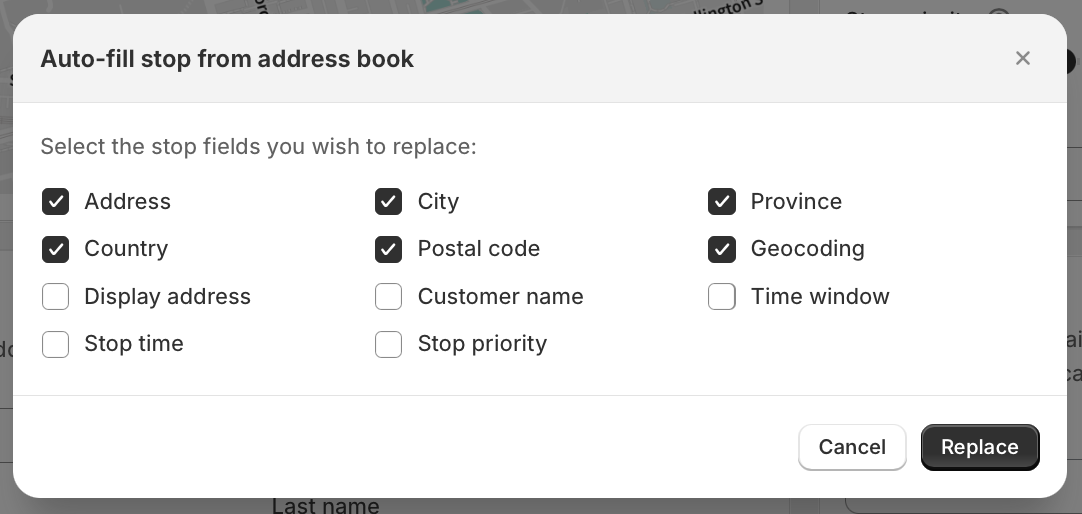
- You'll be prompted to select which stop details to use from the address book for this stop - configure any additional choices before clicking Replace:
- Once the form is complete, click the Save button in the top navigation bar to update it within your route. Click the Save button in the top navigation bar again to save this change to your route.