
How do I filter orders by delivery area?
EasyRoutes allows you to filter your orders using a number of different order criteria, or by selecting orders automatically using our visual map planning tools. You can even save these filter or boundary preferences as saved views to quickly access in the future as tabs in your Orders page. You can use saved boundaries as a geofence for creating routes for drivers where you filter orders for that geographic area.
Filter by Zip or Postal Codes
To filter your orders by postal codes or ZIP codes, go to the Orders page and click on the Add filter button, and select Postal code:

A text box will open for you to type in the postal codes that make up your delivery area. To include a group of codes, add an asterisk (e.g. *) after the initial characters to indicate a range to filter by. For example, M4M* looks for postal codes starting with M4M.
You can click the applied Postal code filter to add as many postal codes as you need to create your area:

As you add postal codes you will notice your list of orders will change to only show those orders. You may want to add additional filters (e.g. Routed filter > Not routed orders) as well.
If you'd like, you can then scroll up just above the map and click the Create view button (plus icon), and input a name for your saved set of postal codes:

Your saved filters will be added as a tab. In the future you can click that tab, and instantly see only the orders that belong in that set of postal codes:

Then you can select the orders that you want to include in a route. Learn more about creating routes in our getting started guide.
Filter by City or by State/Province
To filter your orders by cities or by state/province (or the equivalent in your country), go to the Orders page and click on the Add filter button. A sheet will slide out with additional filters. Go to the City or the State/Province filter to select specific entries that you want to create filters for. You can also enter in a value for a city if this does not exist in the selectable list.
Filter by Visible Area (Saved boundaries)
You can also filter using our visual planning tools within the map and save shapes for later use. You can find more information on creating and managing visual map boundaries here. You can use this feature to create geofences or to geofence an area to be used for filtering orders for planning routes for drivers in a specific region. You can also use our Delivery Zones feature for greater flexibility when using map boundaries for route creation and full compatibility with our automation tools.
Pro Tip: To give yourself a larger area to work with when visually planning on the map, click the Expand map button within the map controls to increase the display size of the map view. Your active Route Options panel will be relocated below the map until it's sized back down using the Shrink map button.
To create a new set of boundaries, select the Saved boundaries icon in the map view on the Orders page - select Create boundary to begin drawing a new boundary set:
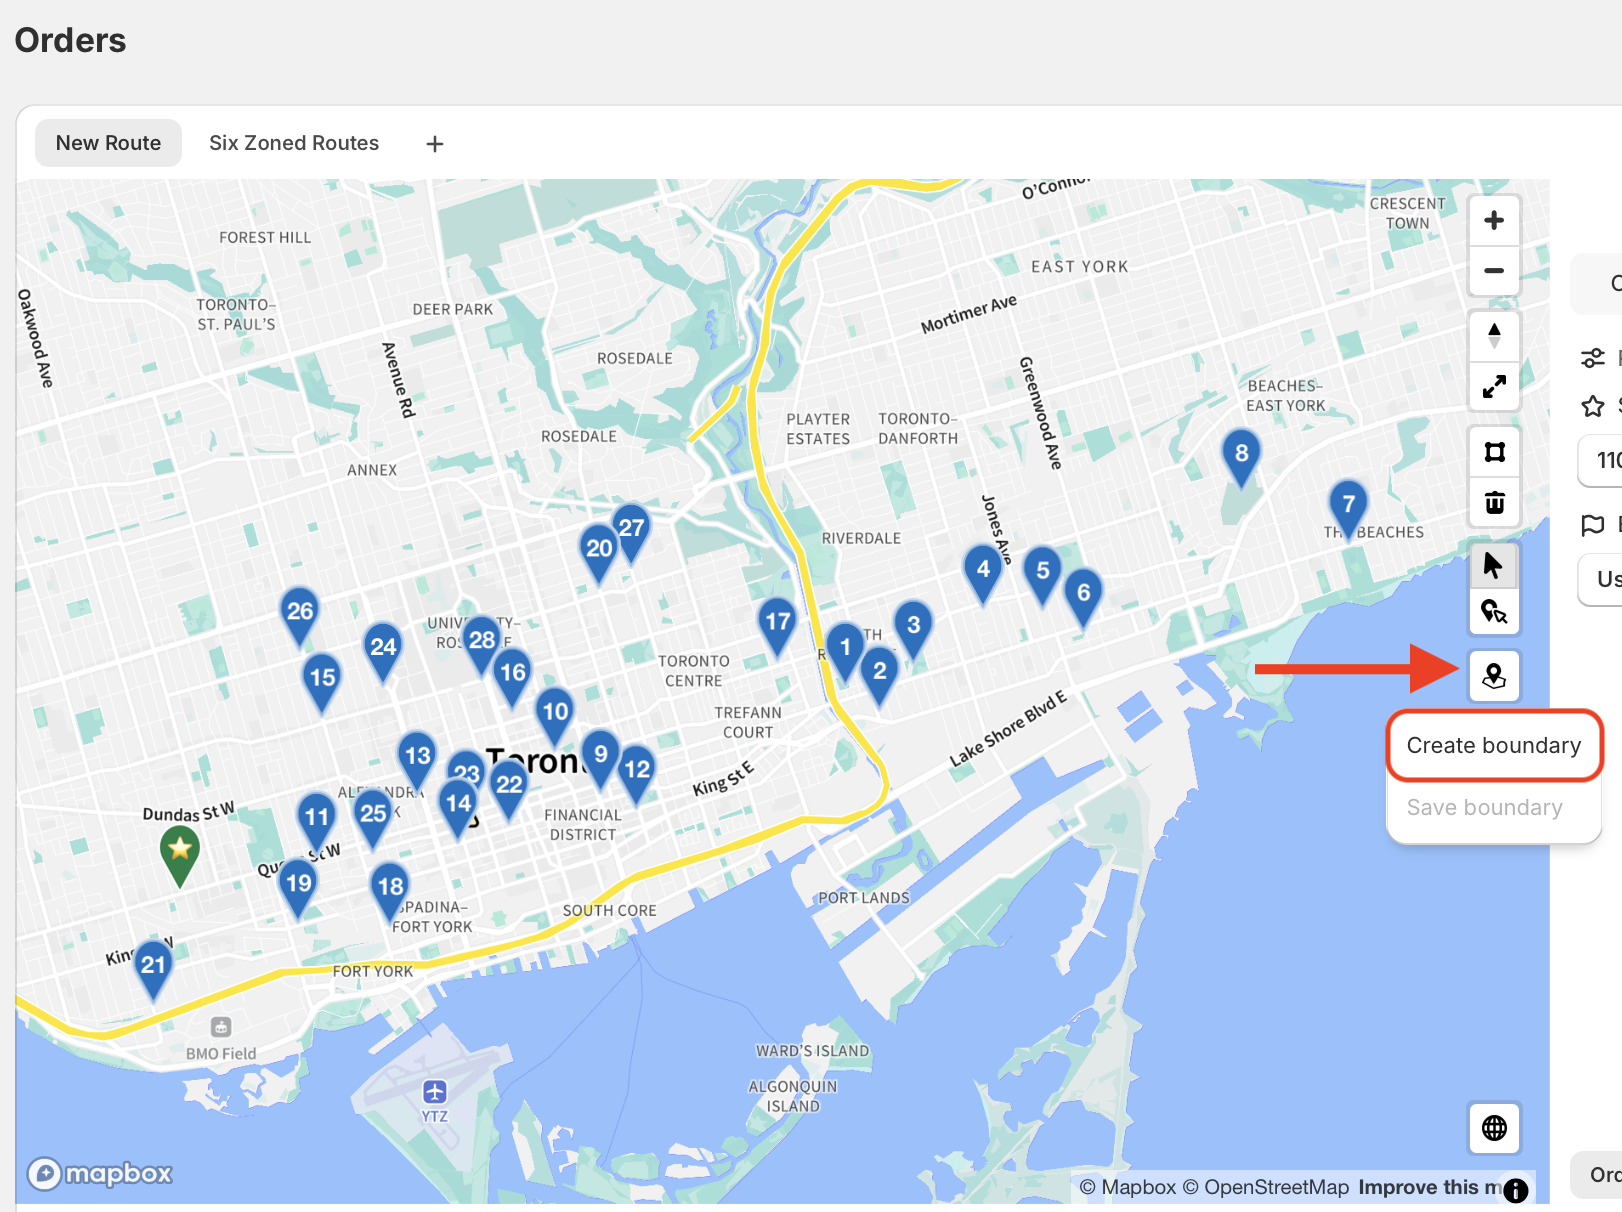
This will enable polygon drawing mode on the map. You can now draw shapes by clicking on the map to add points, eventually connecting them to complete a shape. Note that this tool allows you to click to add individual points that will connect to create a shape on the map, and does not support "dragging" across the map to draw a shape (dragging will simply scroll the around the map):
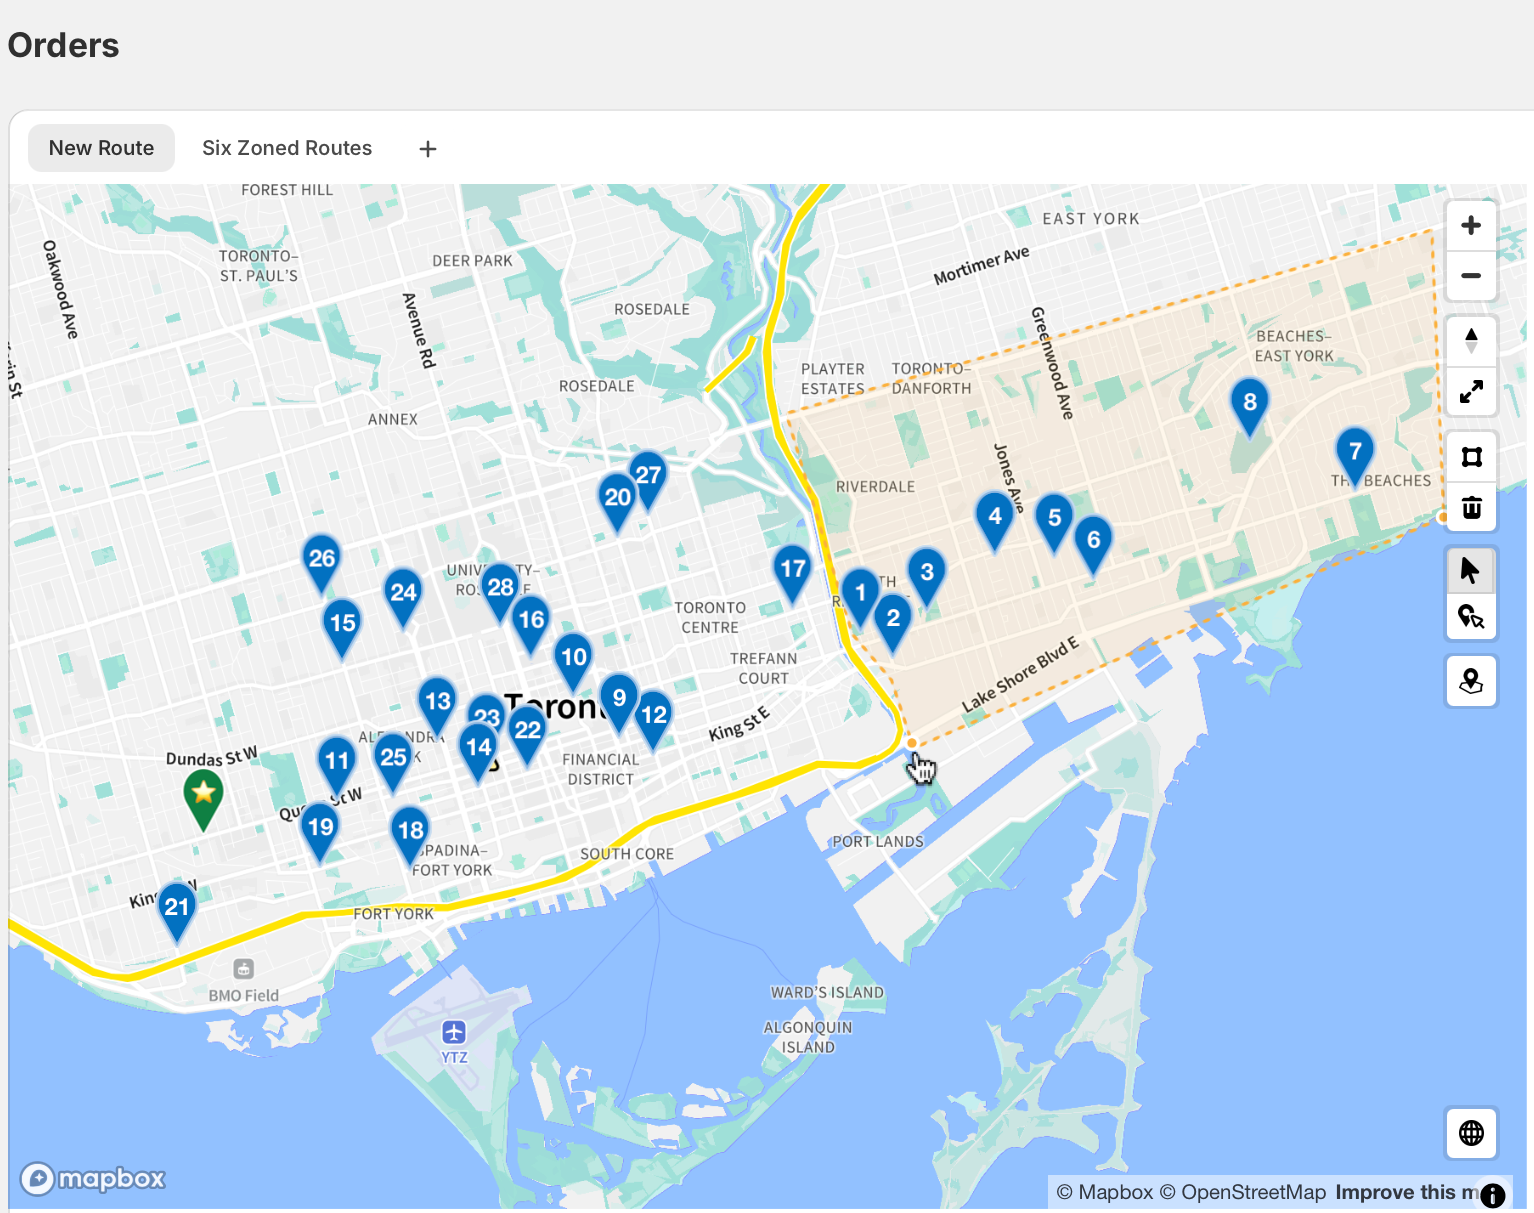
Once you are finished, click again on the first point drawn to complete the boundary. This will launch a Save boundary modal where you can name your newly drawn area, before clicking Save:

The newly configured boundary will now be displayed on the map - you can toggle display on/off using the checkbox, or delete the boundaries on the map entirely using the trash can, both found within the Saved boundaries menu on the map shown below:

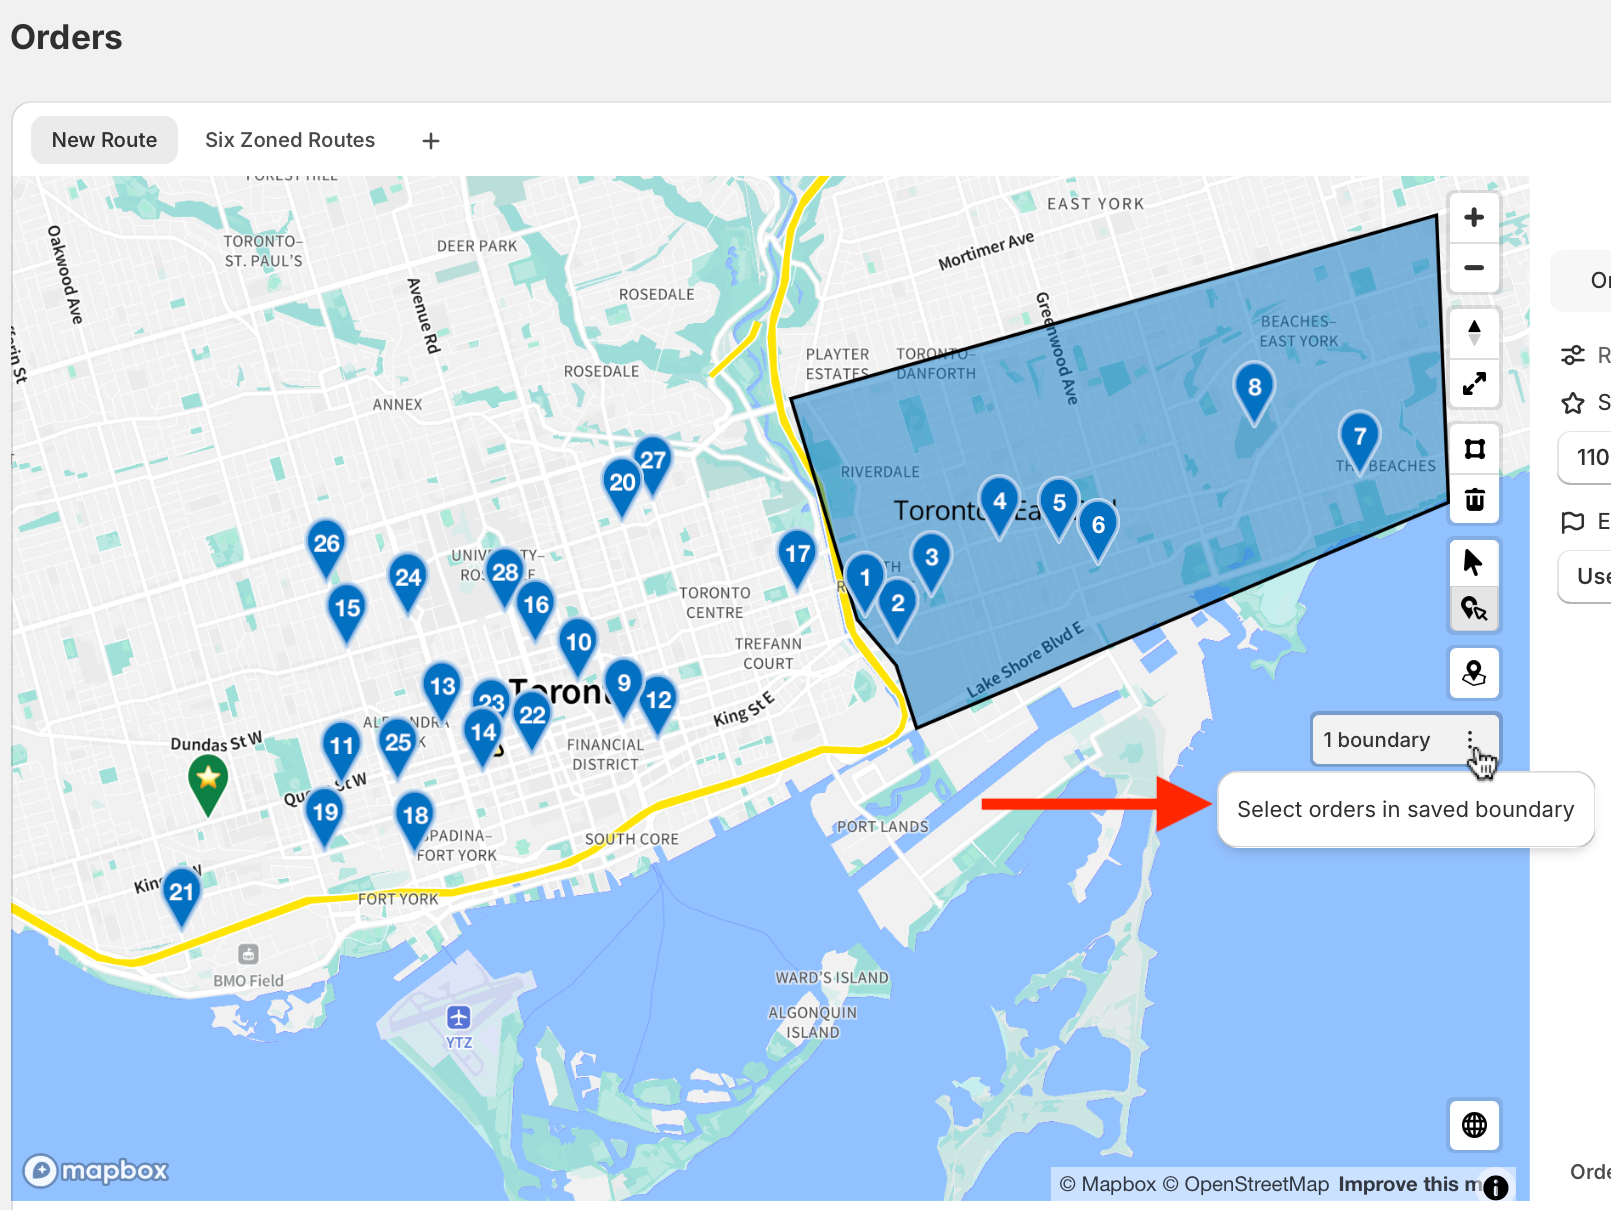
If a boundary is selected/active, you can select all the orders within it using the Select orders in saved boundary option, found within the Actions menu (three dots icon):
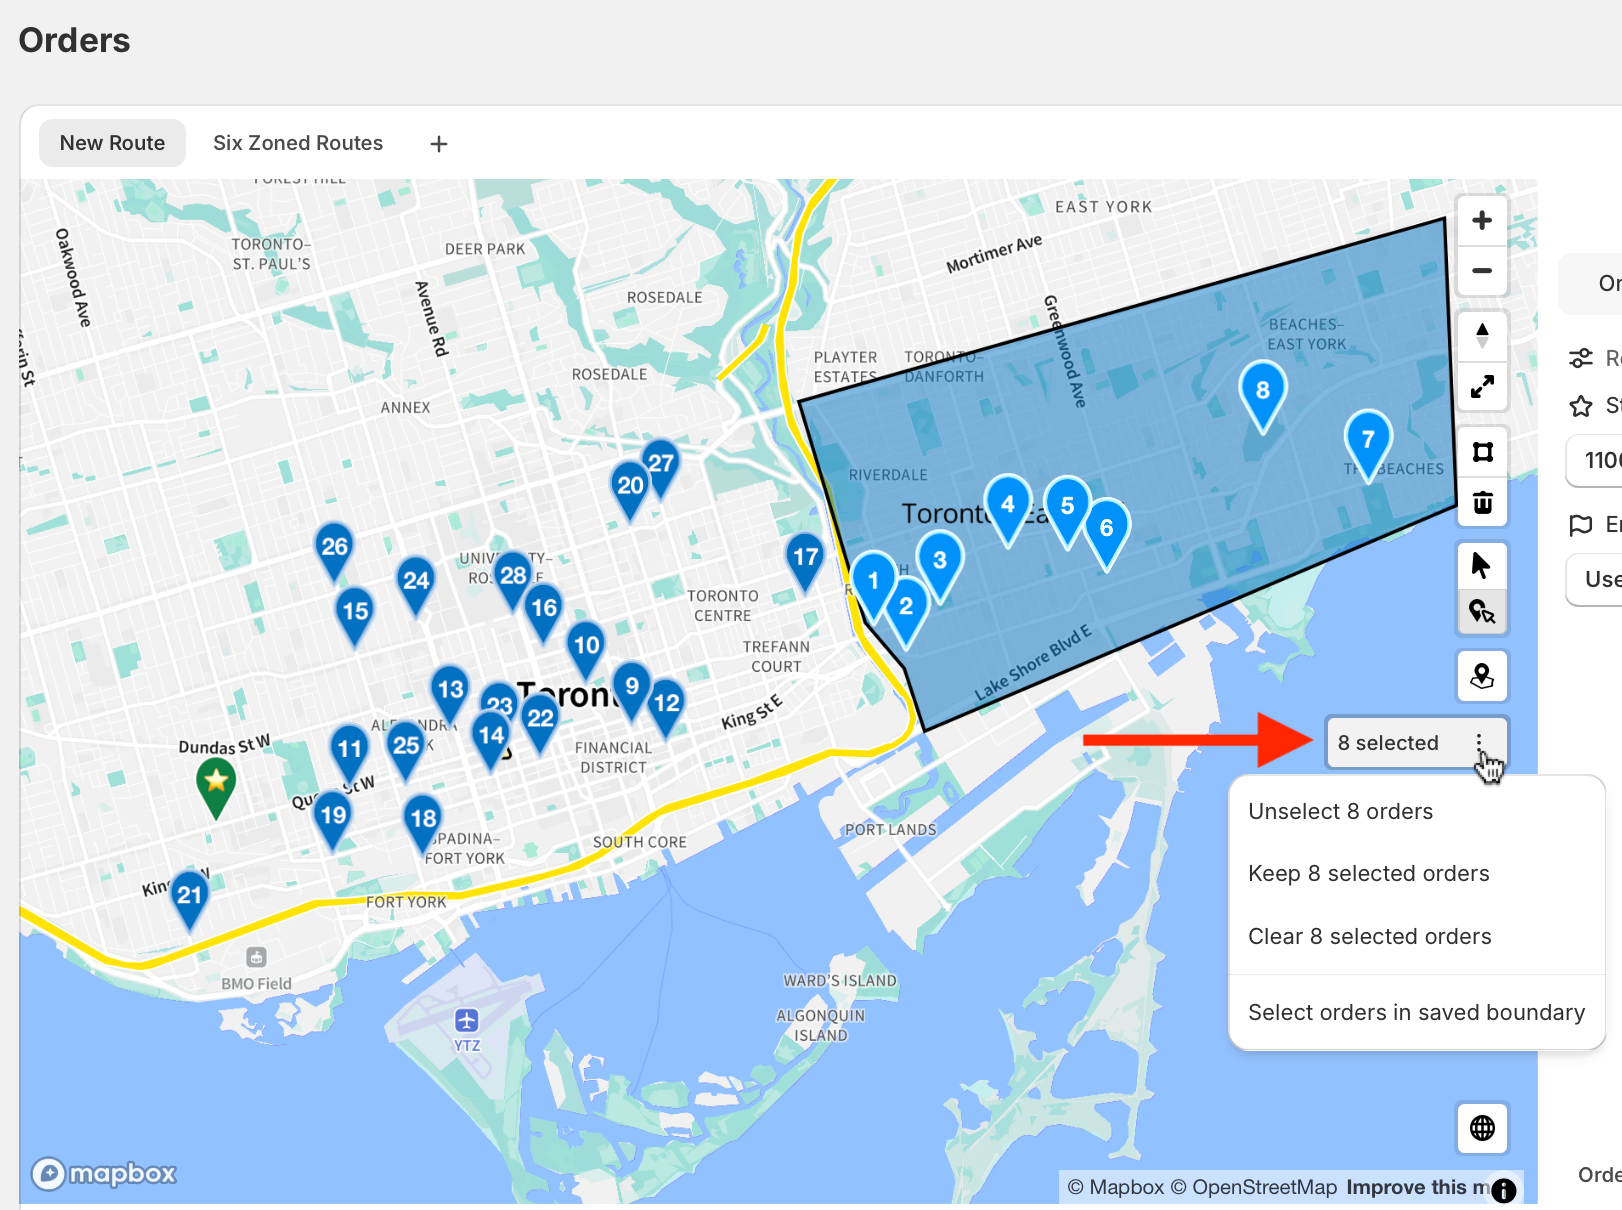
Once orders are selected (indicated with an alternate colour for their map pins), you can opt to keep or remove selected orders based on what you plan to route (i.e. keep them to make a route including these orders; clear them to make a route excluding these orders):
See Map Selection Tools for a description of each available action found above your boundary controls.
You can use a saved boundary for repeated route planning using the Create view button above your list of orders. Any saved boundaries that are active when saving the view will automatically be applied to the map when accessing the saved view tab in the future - more details in this support article:
