
How does the usage-based SMS account balance work?
With EasyRoutes Premium & Enterprise, we offer usage-based SMS notifications in select countries. This is done through creating usage charges that loads up a EasyRoutes Usage Balance. SMS messages sent by route stop events will count against your usage balance based on the recipients' location.
Click either link below for further details specific to the EasyRoutes product you're using:
EasyRoutes for Shopify
To start, your account will need to be verified by the EasyRoutes team before SMS functionality can be enabled. From your EasyRoutes Settings > Customer Notifications tab, scroll down to the SMS notifications section - click the Contact button and complete the form that appears to begin the verification process:

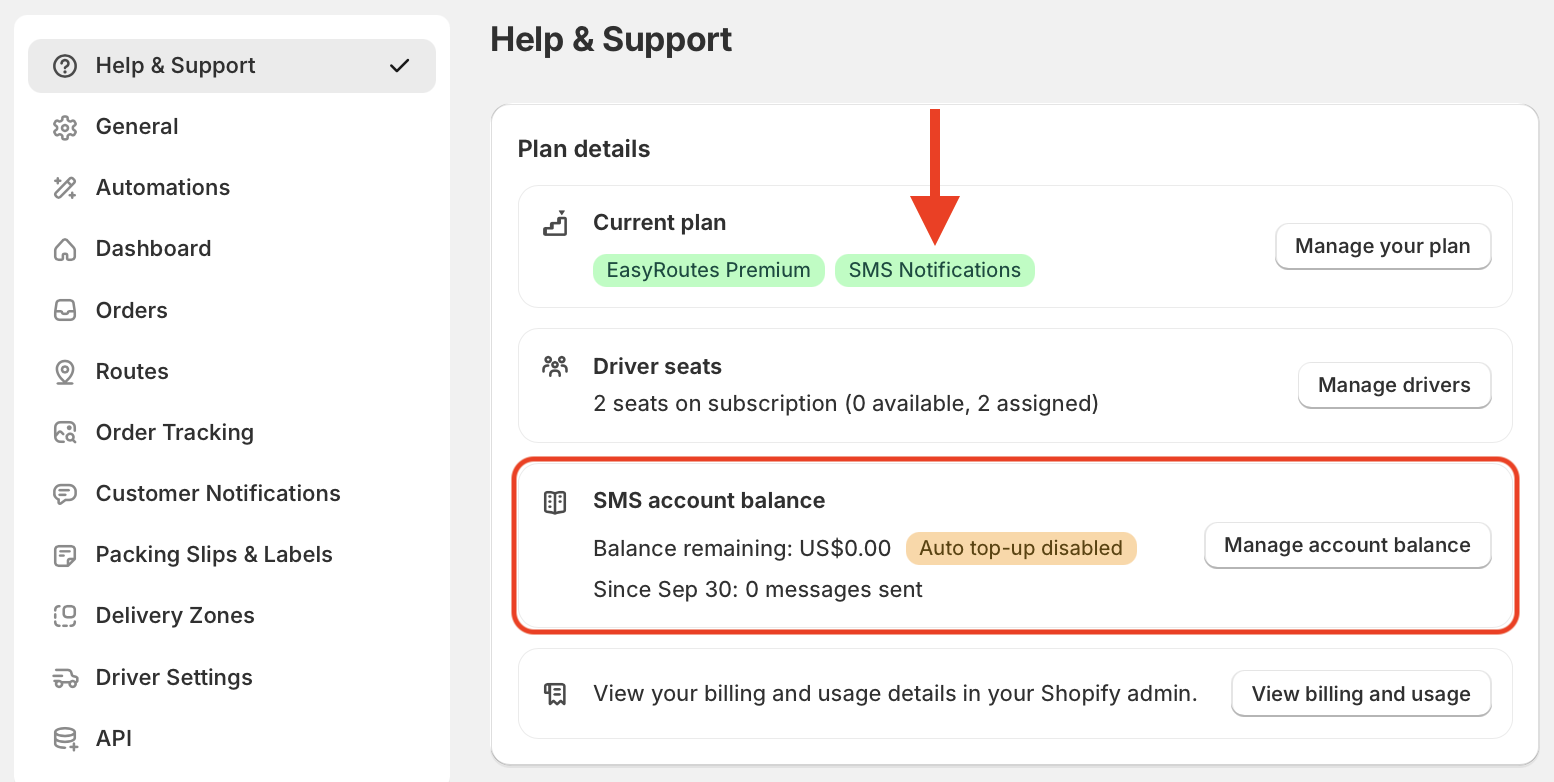
Once SMS notifications have been enabled for your account, a summary of all SMS-related information can be accessed from your EasyRoutes Settings > Help & Support tab, within the Plan details section:
Managing App Spending Limits
When signing up for a Premium plan, if you opt-in to SMS notifications, your plan will show an "App Spending Limit" section. This sets a maximum possible value that a shop can be charged based on SMS usage. The usage maximum establishes how much credit can be added to your balance in a given subscription period. You are only issued a usage charge whenever a usage balance is actually added via the Manage account balance section highlighted above (found in your EasyRoutes Settings > Help & Support tab, within the Plan details section).
To access or update your app spending limit for EasyRoutes:
- Access your Shopify Settings from the admin sidebar.
- Click into the Apps menu item.
- Select EasyRoutes Local Delivery from the list of apps installed for your store.
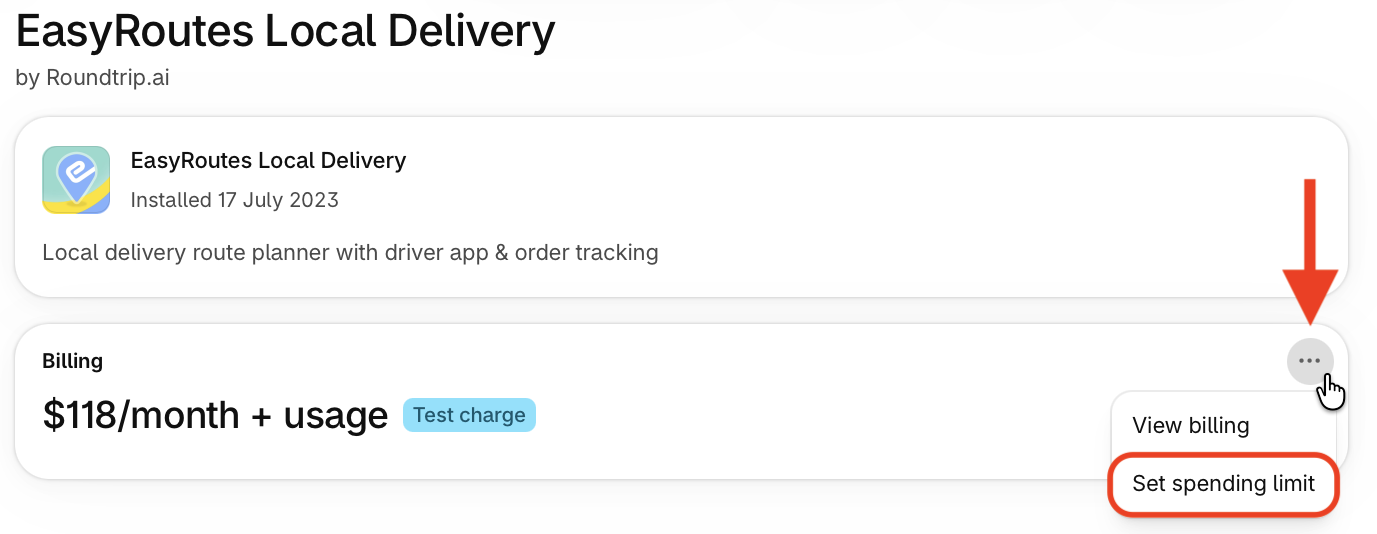
- From the summary page of EasyRoutes details displayed, access the Billing section shown below; click the three dots icon here, and select Set spending limit:
- The modal will display any usage spend in the current subscription cycle. Adjust the value in the Enter an amount input box to increase or decrease the authorized monthly limit EasyRoutes can use for SMS usage & top-ups:
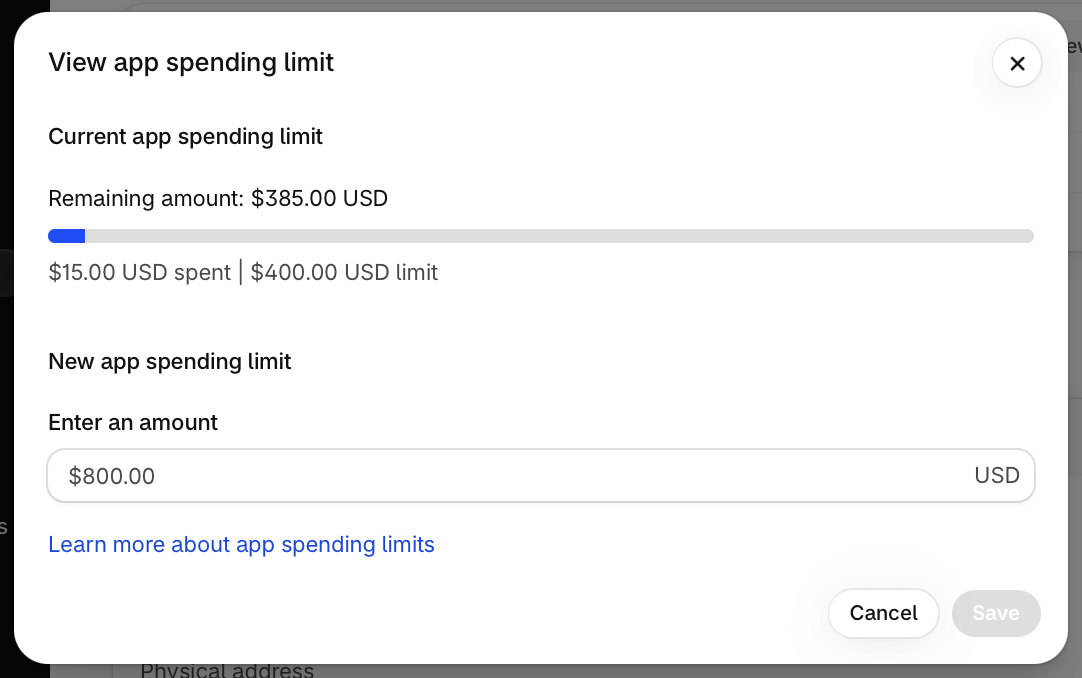
By default, the app spending limit will be set to $200 USD for each driver seat in your account - for example, if you're on a 1 driver seat plan, the limit will be $200 USD; on a 5 driver seat plan, the limit will be $1000 USD. Adjust as necessary to reflect your operation's needs.
Adding to EasyRoutes Usage Balance
Once SMS is approved and an app spending limit established, initiate a top-up for EasyRoutes to use when sending SMS notifications:
- From your EasyRoutes Settings, access the Help & Support tab.
- Within the Plan details card, the SMS account balance will display an initial balance of $0.00 (as shown below); click the Manage account balance button:

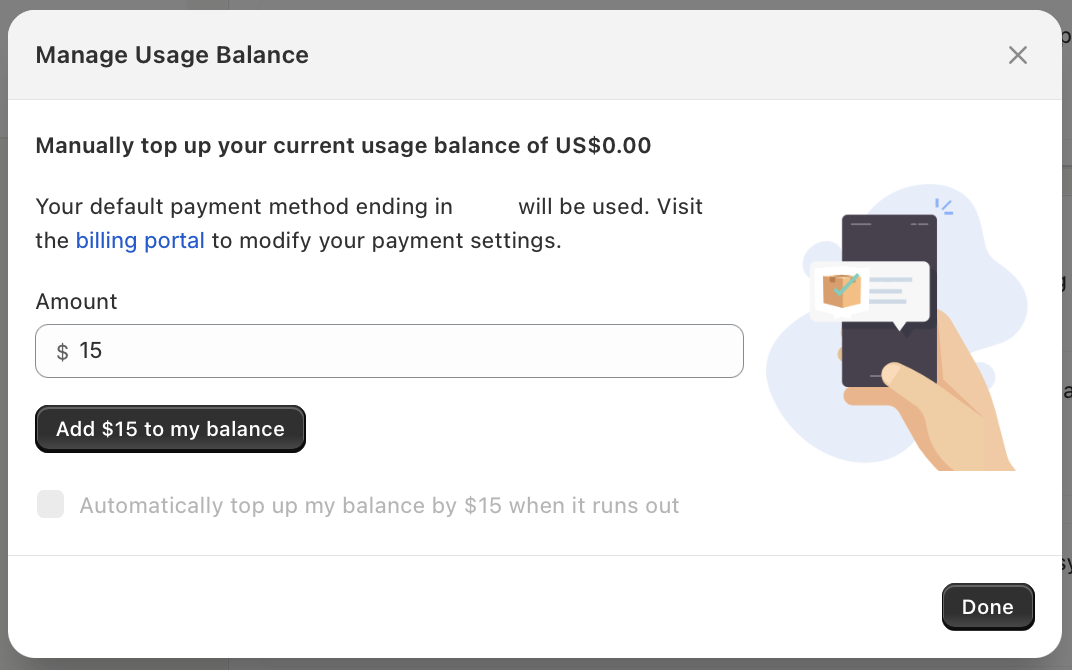
- In the modal that appears, input the balance amount you'd like to add to your account - the default/minimum amount is $15, but can be increased up to $200 for less frequent top-ups:
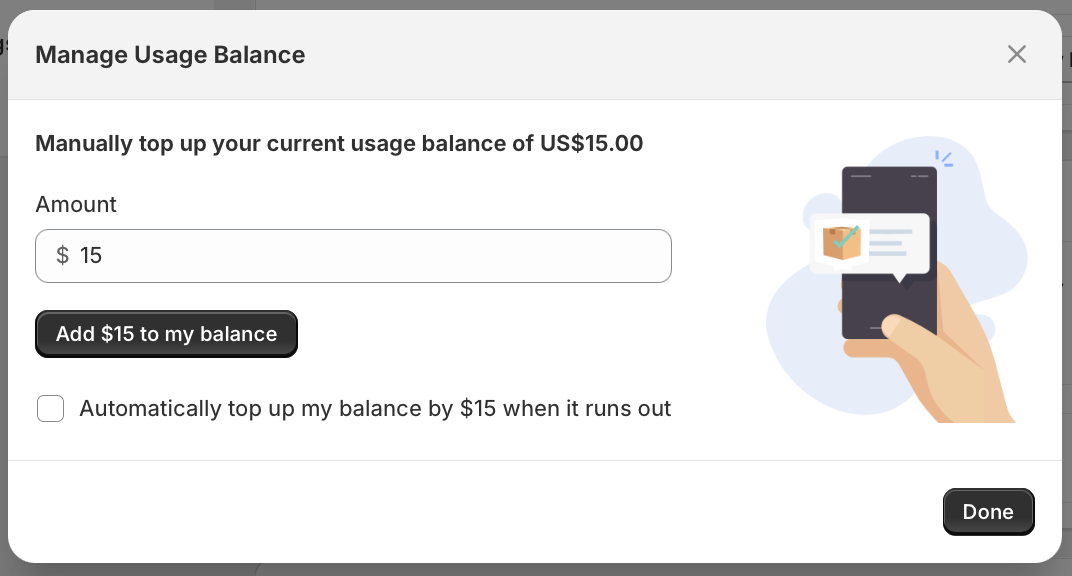
- Optionally tick the Automatically top up my balance by [amount] when it runs out and we'll automatically issue another charge for the same amount you're adding now if the balance runs out.
Total charges in a single subscription cycle for SMS usage top-up cannot exceed the amount set as EasyRoutes' app spending limit as described in the previous section of this article. You can view your SMS usage and usage balance remaining from your EasyRoutes Settings > Help & Support tab, within the Plan details section at any time.
Any usage top-up charges will appear as “EasyRoutes Usage Fee” in your Shopify invoice. We will also attempt to remind you if your balance is running low on a route page if you are manually adding credits to your balance.
Appendix: Opt-in for Existing Premium Users
Existing Premium users will see an option on the Email & SMS Notifications tab in Settings to "Turn on SMS Notifications":

Selecting this button will launch a plan approval page to be able to accept usage-based charges.
EasyRoutes for Web
To start, your account will need to be verified by the EasyRoutes team before SMS functionality can be enabled. From your EasyRoutes Settings > Customer Notifications tab, scroll down to the SMS notifications section - click the Contact button and complete the form that appears to begin the verification process:
Once SMS notifications have been enabled for your account, a summary of all SMS-related information can be accessed from your EasyRoutes Settings > Help & Support tab, within the Plan details card:

From the SMS account balance section, click the Manage balance link to begin the process of adding funds to your SMS balance - a warning may display requiring a default payment method:

Click the Go to billing portal button and ensure a listed payment method has been made default:

Return to your EasyRoutes Settings > Help & Support tab, and click the Manage balance link again. In the modal that appears, input the balance amount you'd like to add to your account - the default/minimum amount is $15, but can be increased up to $200 for less frequent top-ups:
Optionally tick the Automatically top up my balance by [amount] when it runs out and we'll automatically issue another charge for the same amount you're adding now if the balance runs out.