
Route Tags
Route tags can be applied to categorize routes, improve filtering behaviour when finding specific types of routes, or to split out detailed Analytics reports by specific criteria, depending on your delivery workflows. Use tags to classify routes by vehicle type, service standard, geographical area, or any other metric useful to your operations - the sky's the limit!
Adding route tags
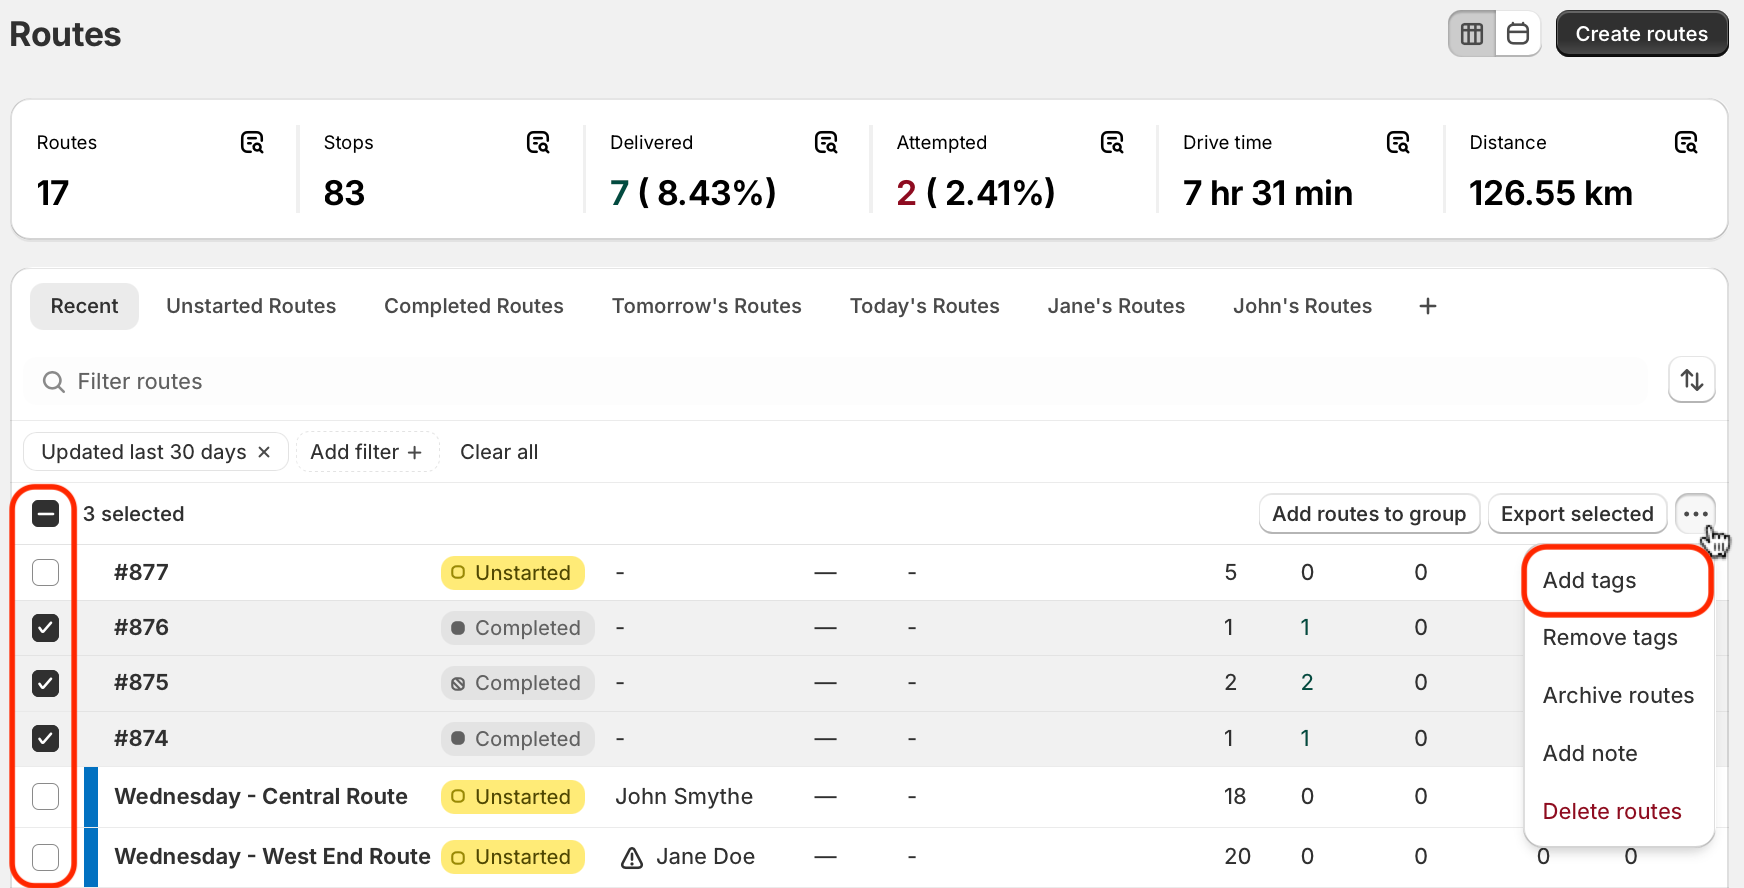
Route tags can be added from the Routes page, first using the checkboxes to select which route(s) you'd like to apply tag(s) to. From the menu that appears in the upper right-hand corner of the table, click into the More actions menu (three dots icon), and select Add tags:
Use the search bar to find a previously created tag, or create a new one. Use the checkboxes to select desired tags and move them to the To add section. Click the Save button once all desired tags have been selected for addition:

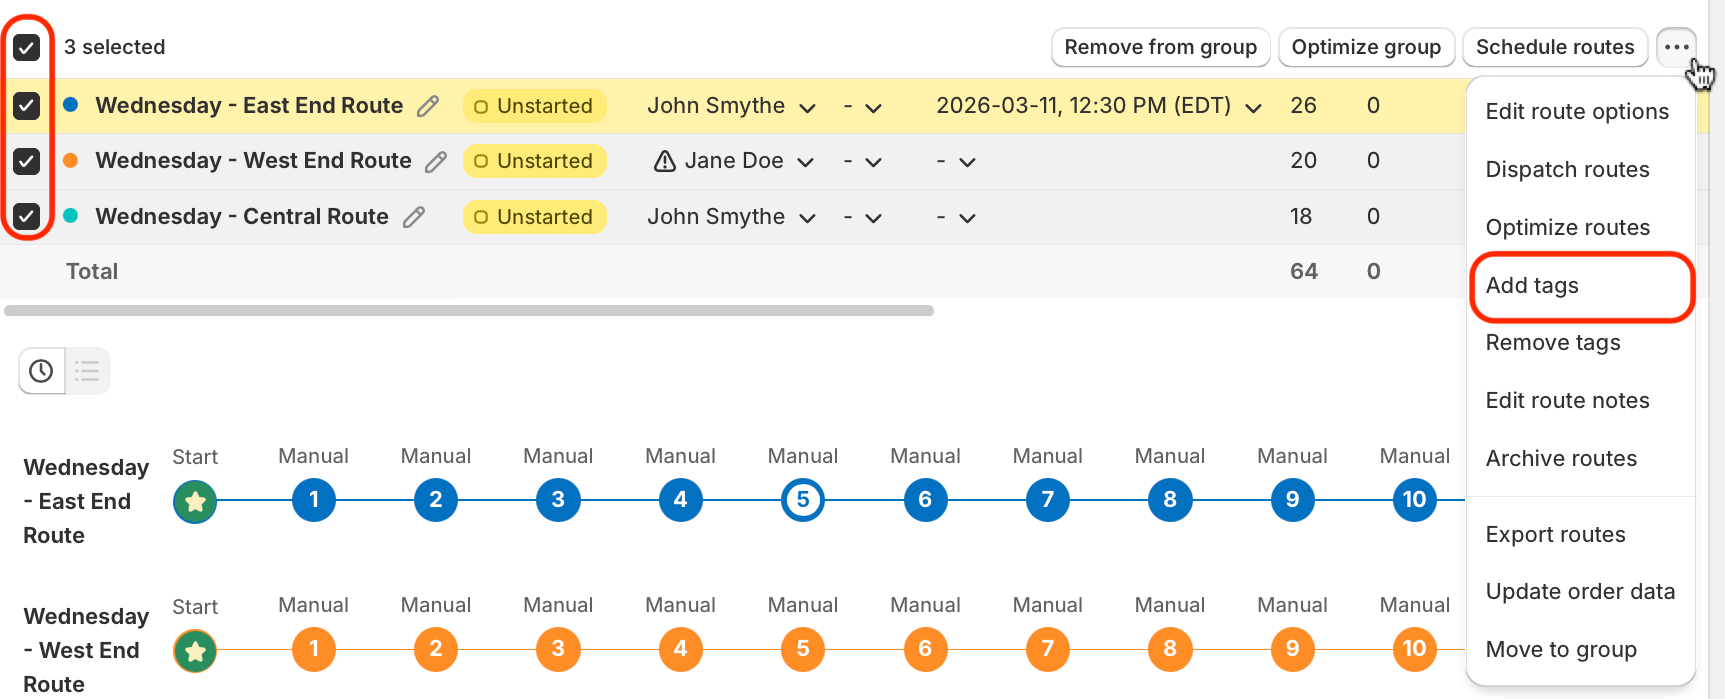
Route tags can also be added from the All routes view of any Route Group in the same manner:
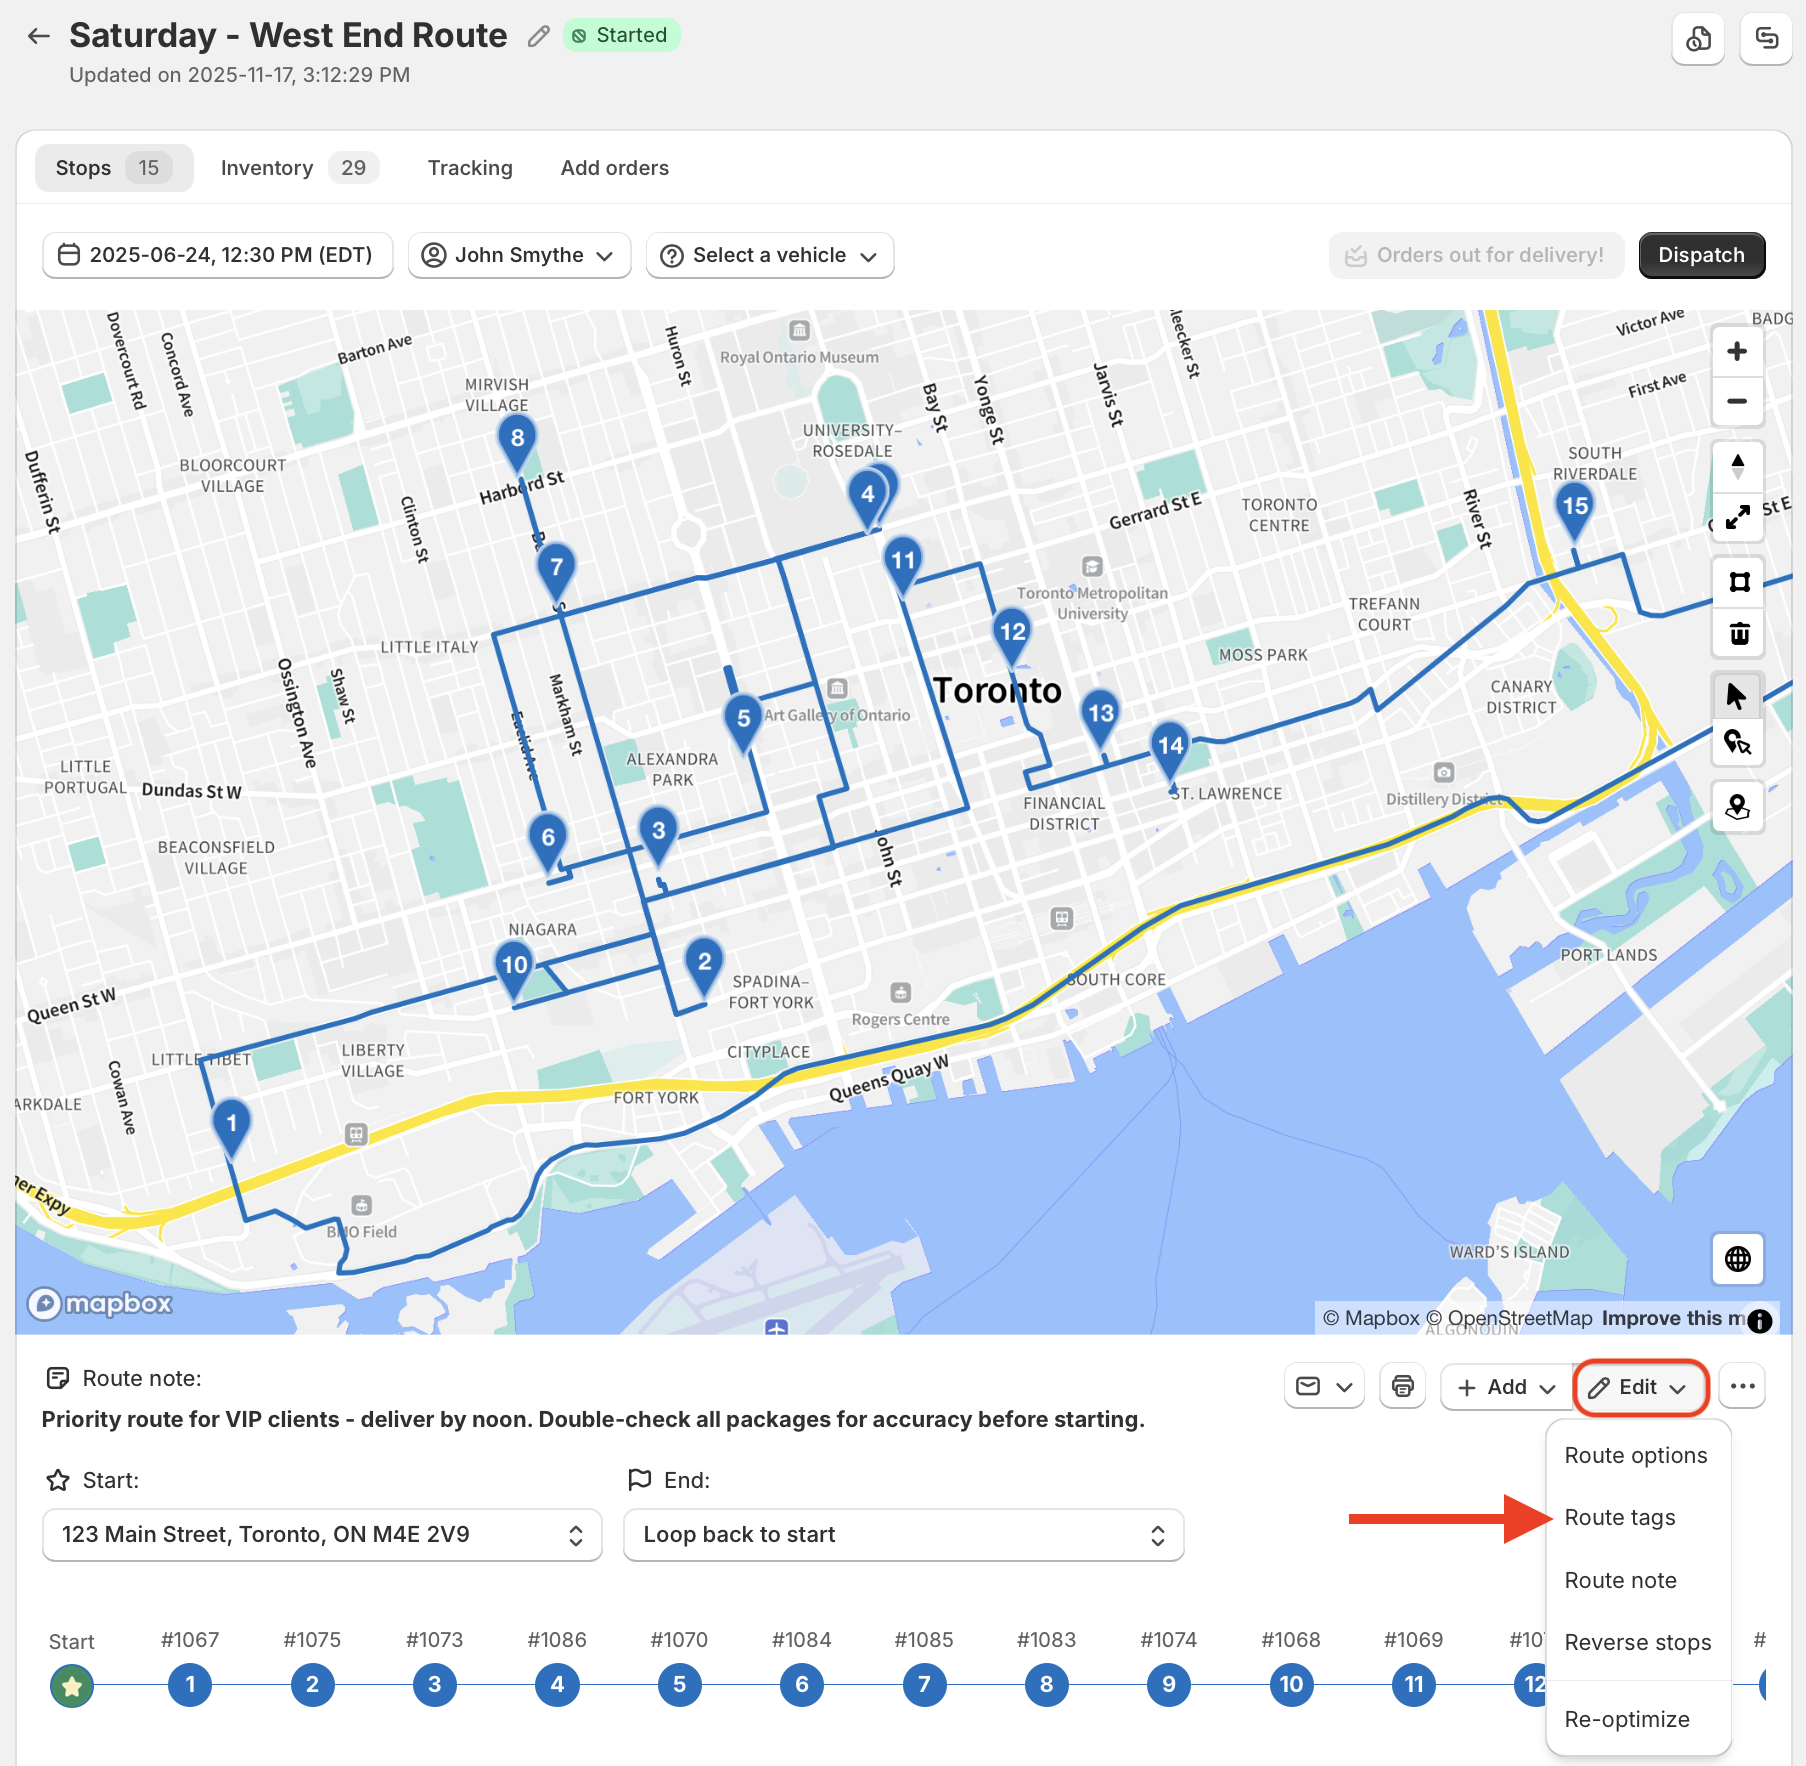
When viewing an individual route, tags can be added by accessing the Edit menu directly below the map, and selecting Route tags:
Removing route tags
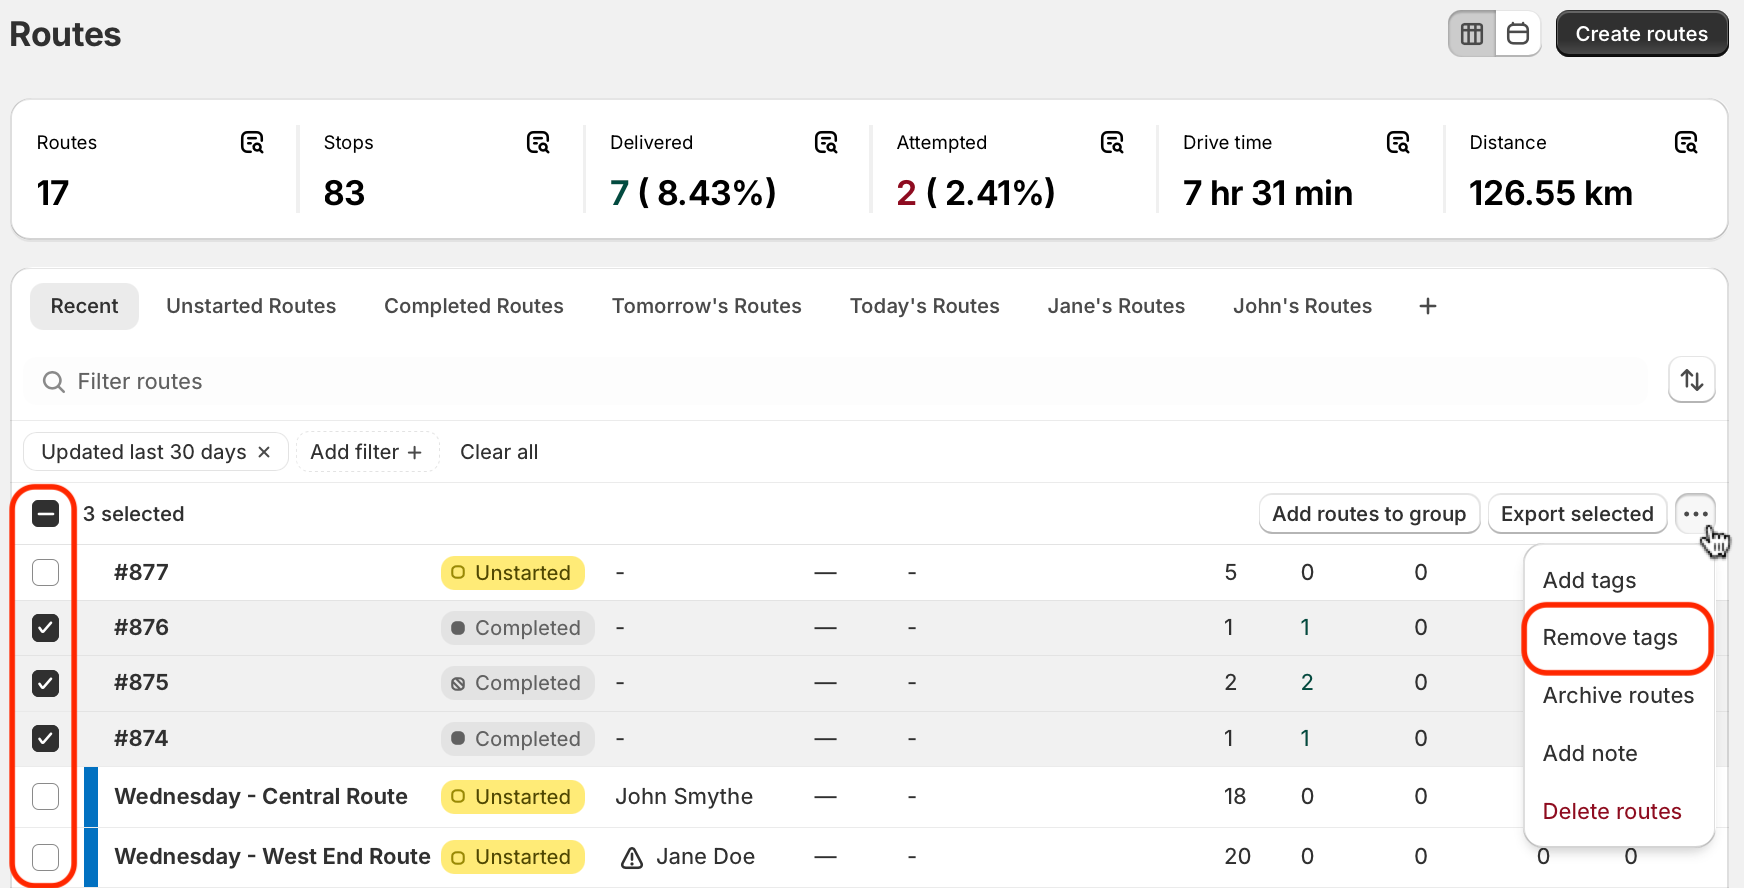
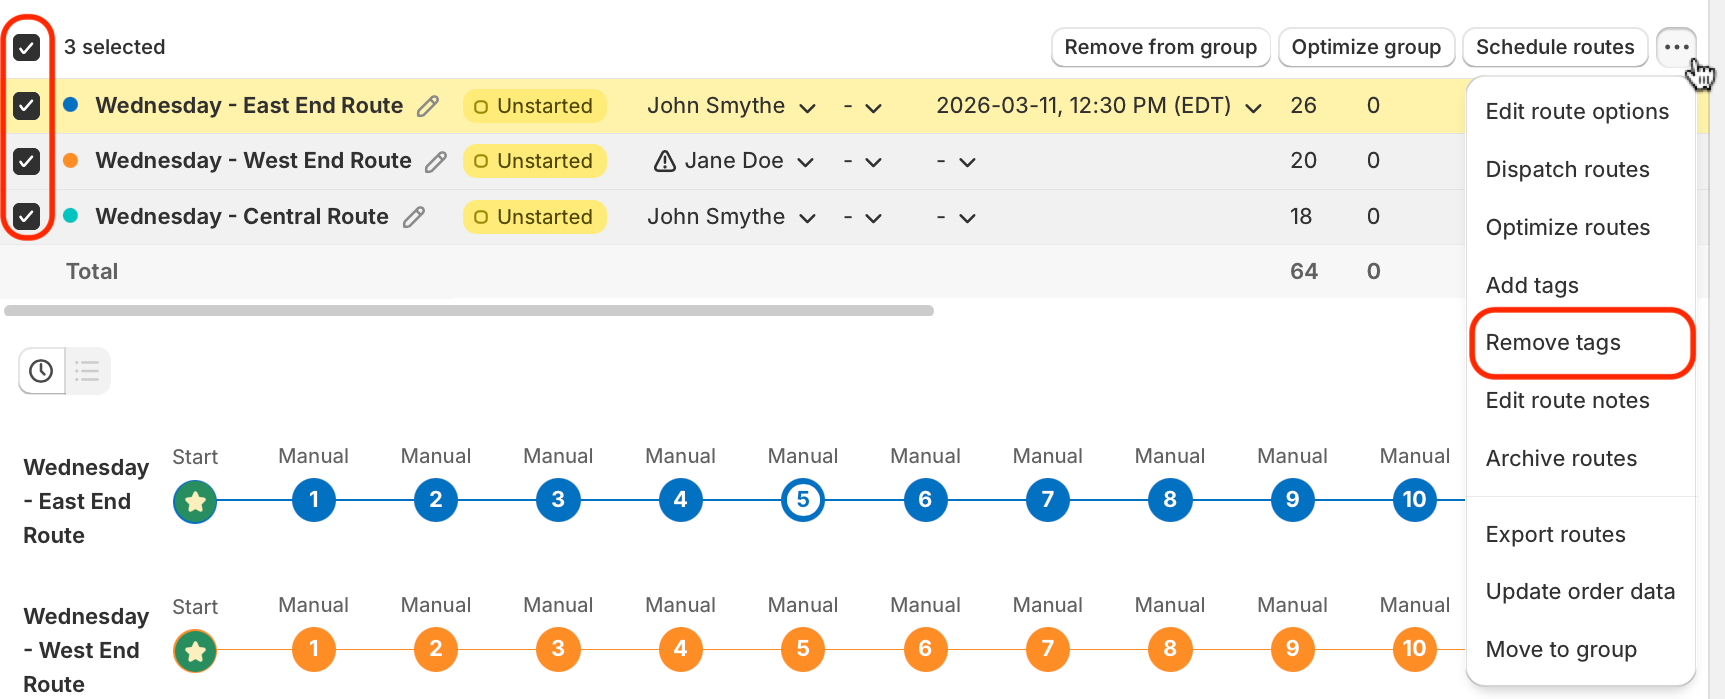
Route tags can be removed from the Routes page, first using the checkboxes to select which route(s) you'd like to remove tag(s) from. From the menu that appears the upper right-hand corner of the table, click into the More actions menu (three dots icon), and select Remove tags:
Tags that are currently applied to the selected routes will be listed in the Your tags section; the search bar can also be used to narrow down long lists of existing tags. Use the checkboxes to select undesired tags and move them to the To remove section. Click the Save button once all required tags have been selected for removal:

Route tags can also be removed from the All routes view of any Route Group in the same manner:
When viewing an individual route, tags can be removed by accessing the Edit menu directly below the map, and selecting Route tags:
Viewing route tags
When viewing an individual route page, applied route tags will display at the top of the page, to the right of a route's name and status:

From the All routes view of any Route Group, all applied route tags will be displayed within the Tags column:

Route tags will also display within the Tags column for applicable routes listed on the Routes page:

To filter the Routes page to only display routes with specific tag(s) applied, use the Add filter button at the top of the route list, and select Tagged with; search and select from a list of route tags currently applied to your routes. This filter supports AND/OR logic (i.e. filter to include multiple required tags using AND, or filter to use one or more of multiple optional tags using OR):

Drivers can also access route tags (along with route notes, if applicable) within the Delivery Driver mobile app (version 1.0.62 or above required), at the top of any route's summary page:

Route tags & Analytics reports
From the main Analytics page, use the Add filter button to search and select from a list of route tags historically applied to your routes. This feature supports AND/OR logic (i.e. filter to include multiple required tags using AND, or filter to include one or more of multiple, optional tags using OR.) Default value is no tags selected:

Once added as a filter, tags will be maintained when clicking into individual Analytics reports, but will be cleared when navigating out of Analytics into any other EasyRoutes tab.