
Barcode scanning
EasyRoutes supports scanning barcodes in two main formats: barcodes natively generated by EasyRoutes and included on packing slips & packing labels, and barcodes associated with products or created and attached to orders via other external tools.
EasyRoutes-generated barcodes
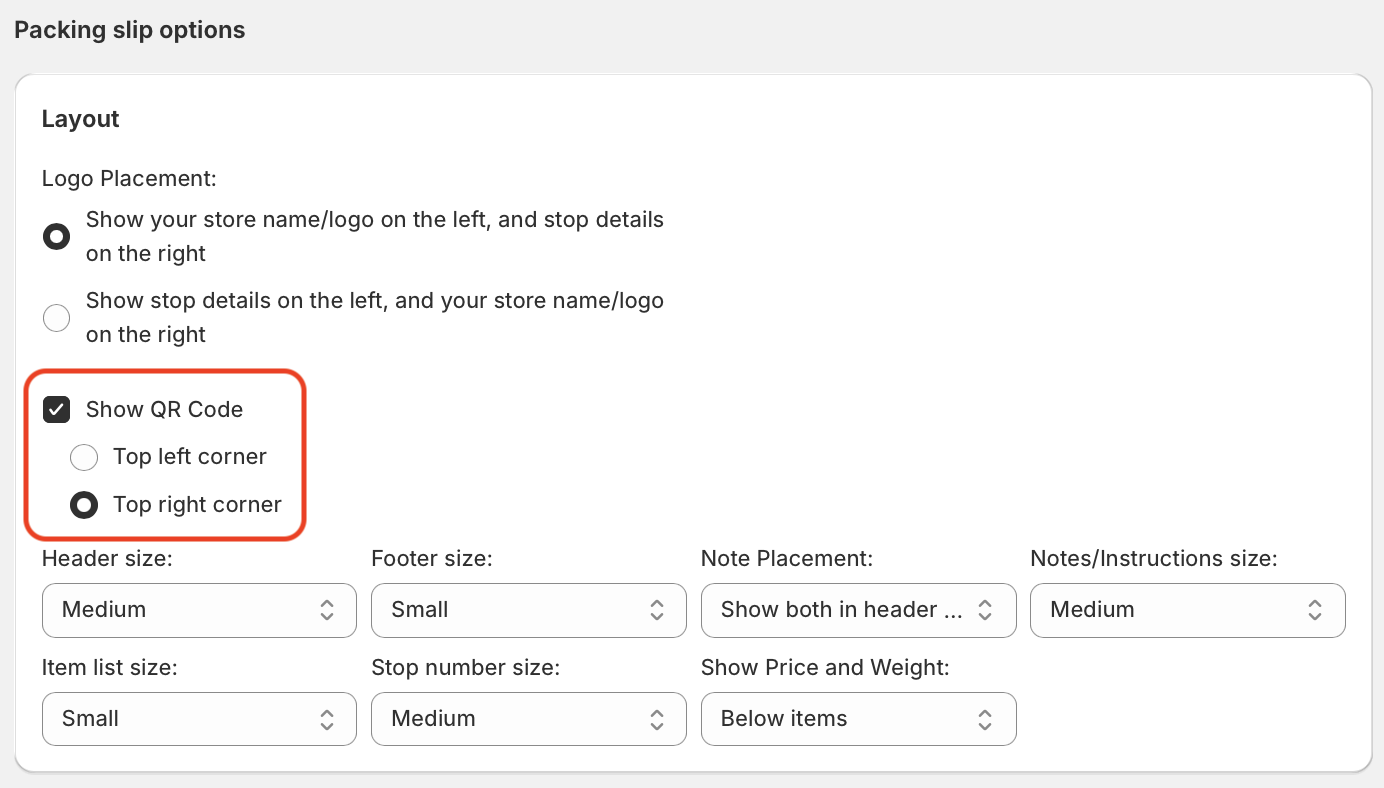
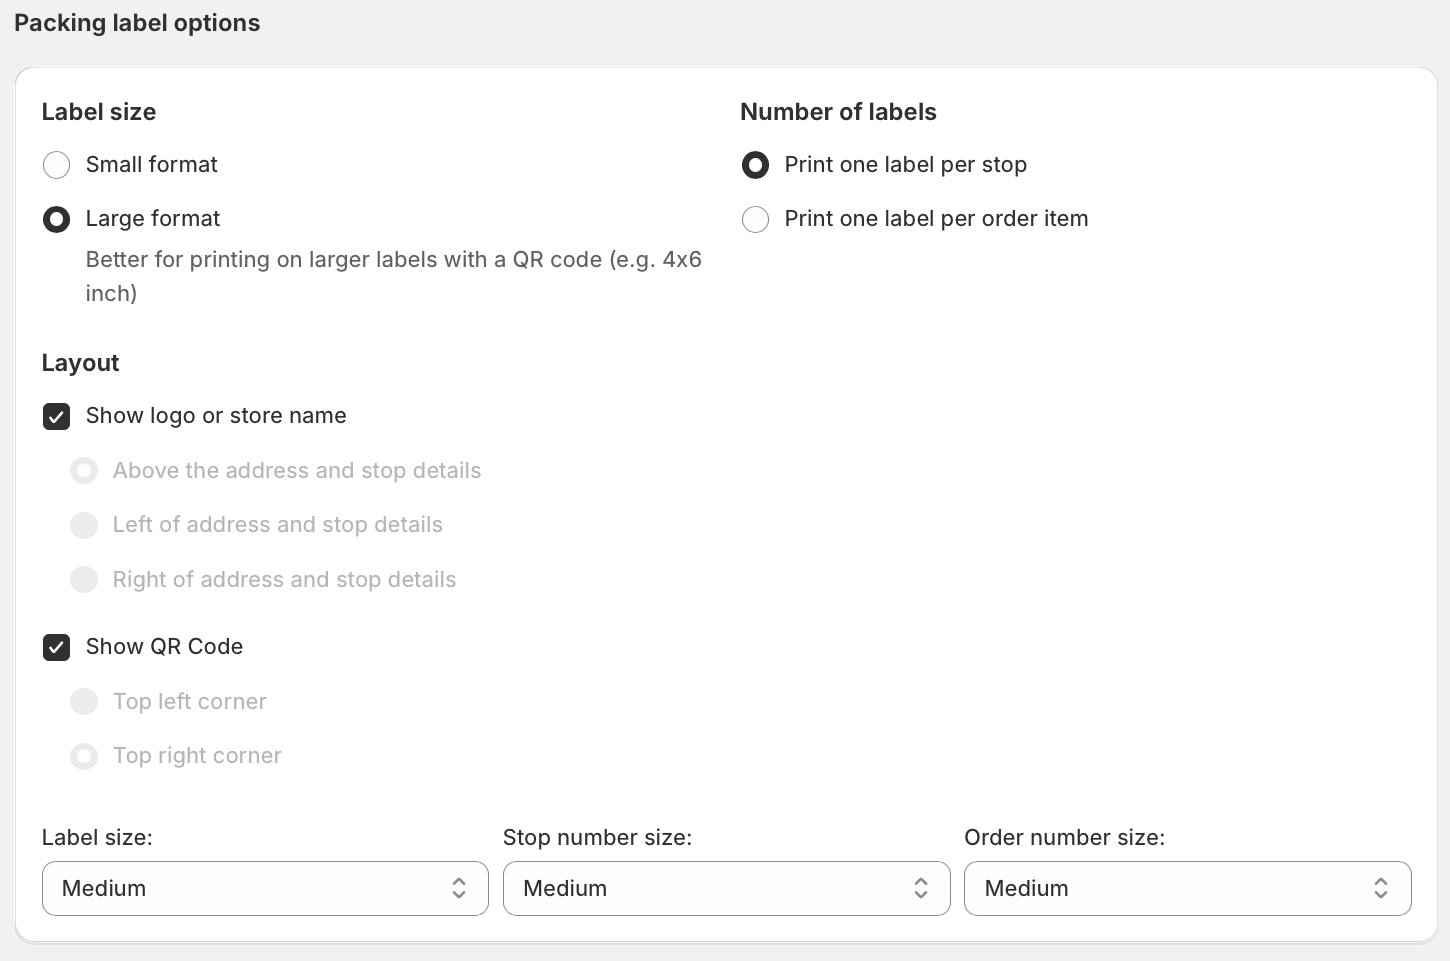
Users can enable barcode display and positioning on packing slips & packing labels from their EasyRoutes Settings > Packing Slips & Labels tab, within the Packing slip options and Packing label options sections:
Once enabled, EasyRoutes barcodes can then be scanned by drivers for each stop on their route, and reviewed by route planners from the proof of delivery section of any in progress or completed route.
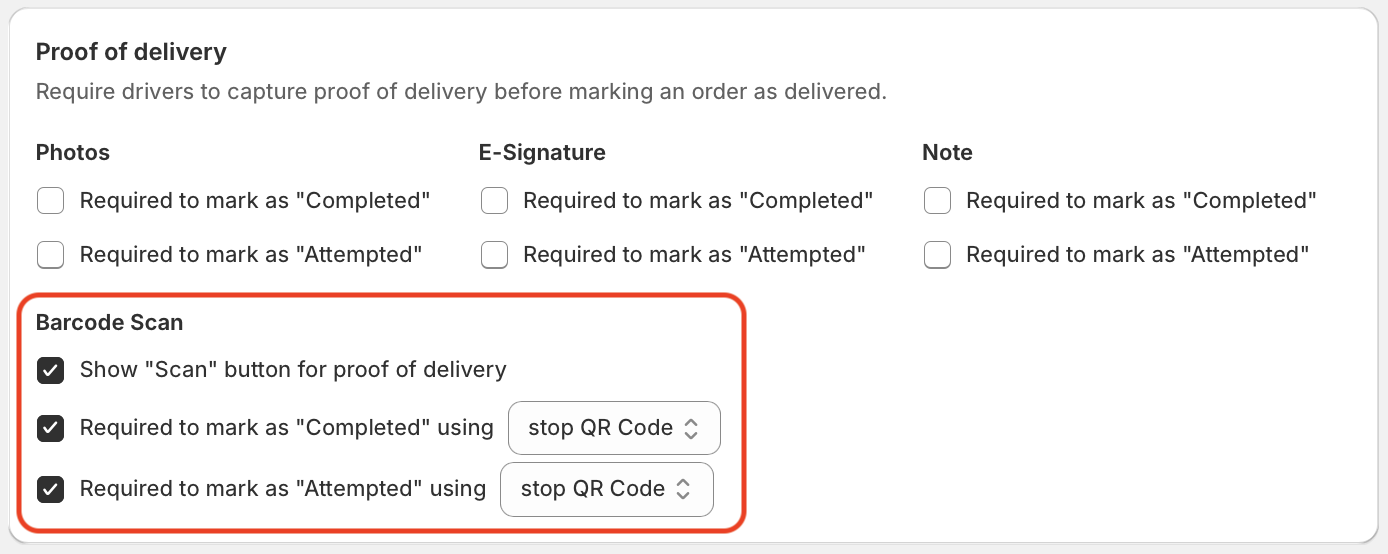
Users can also require that a scanned barcode match the barcode associated with the stop being scanned - configure this behaviour from your EasyRoutes Settings > Driver Settings tab, within the Proof of delivery section shown below, where the Scan button can also be removed as a proof of delivery upload option altogether:
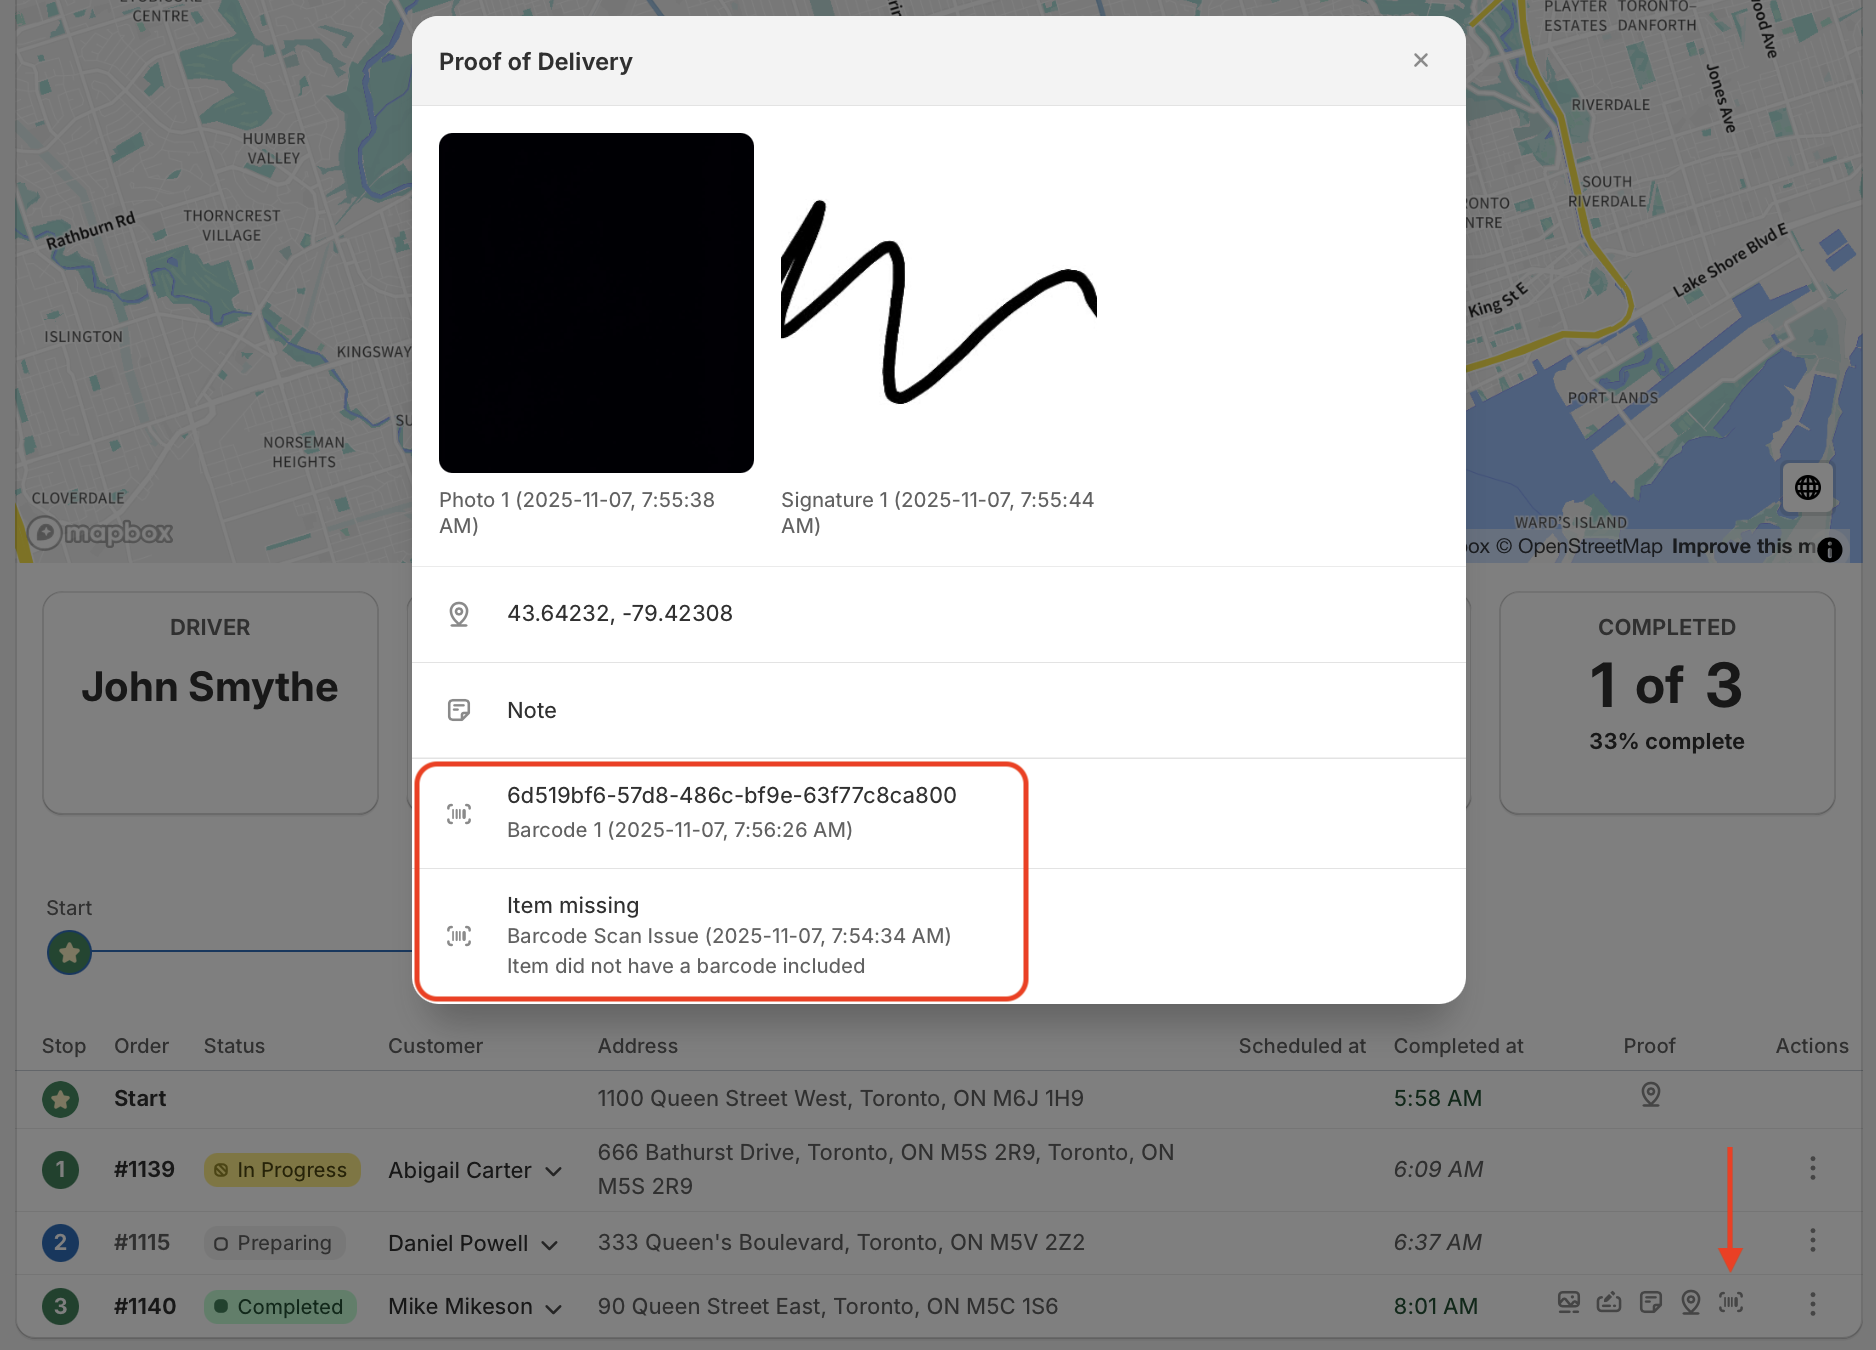
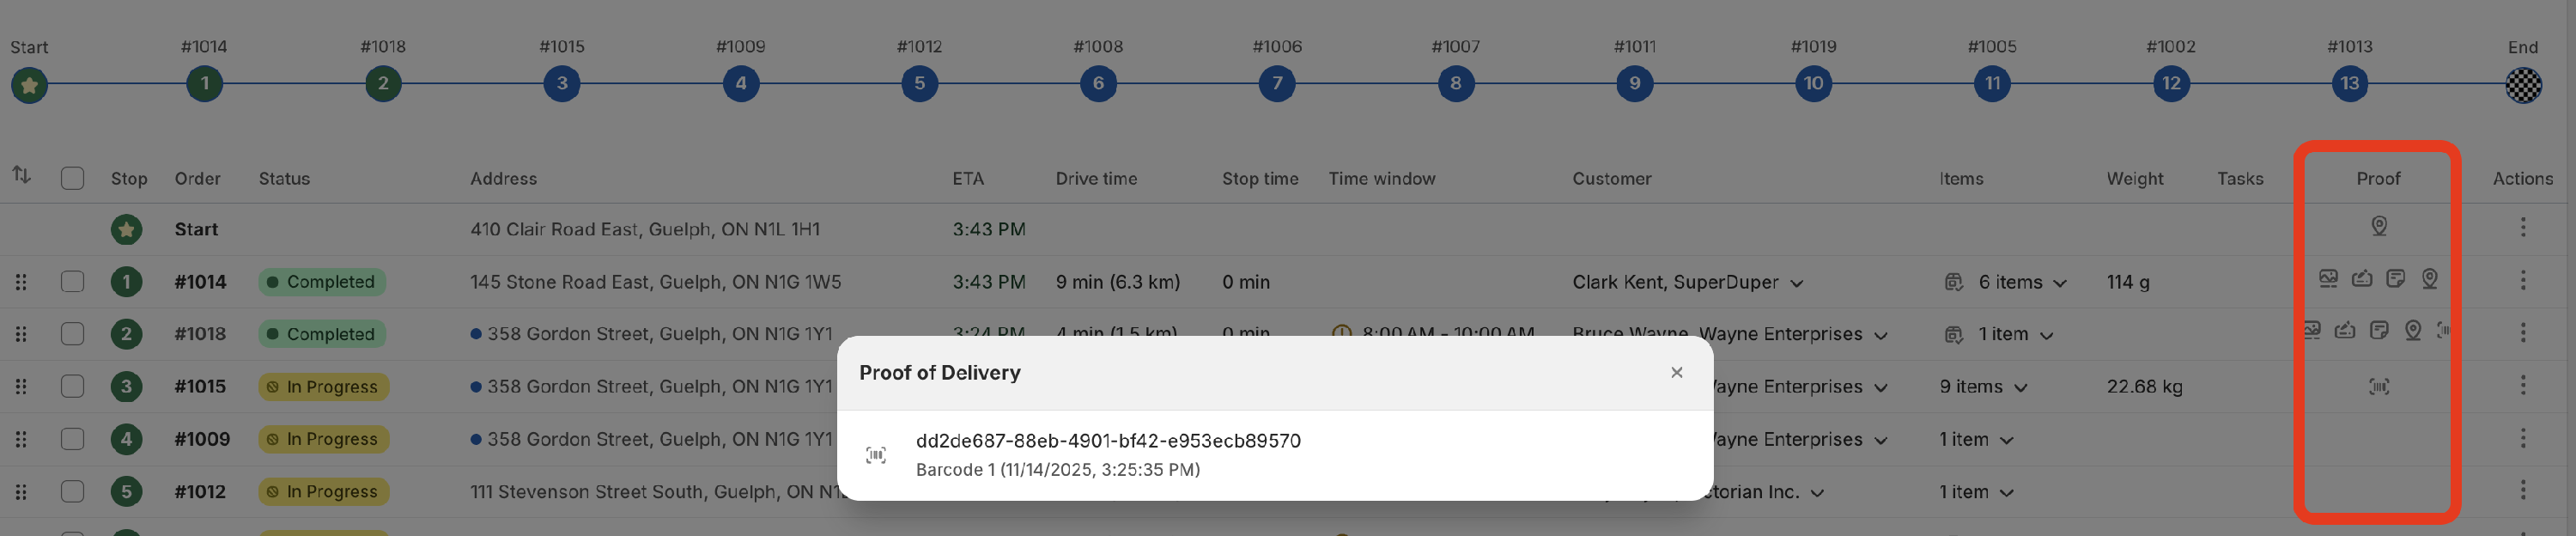
Any barcodes that were scanned by drivers (or scanning issues submitted) will be available for review from the Proof column when viewing any completed route (or in-progress route's Tracking tab), represented by a barcode scan icon alongside all other available proof of delivery items:
Further details on how barcode scanning works from the EasyRoutes Delivery Driver mobile app can be found below, and in this mobile-specific support article.
Proof of Delivery
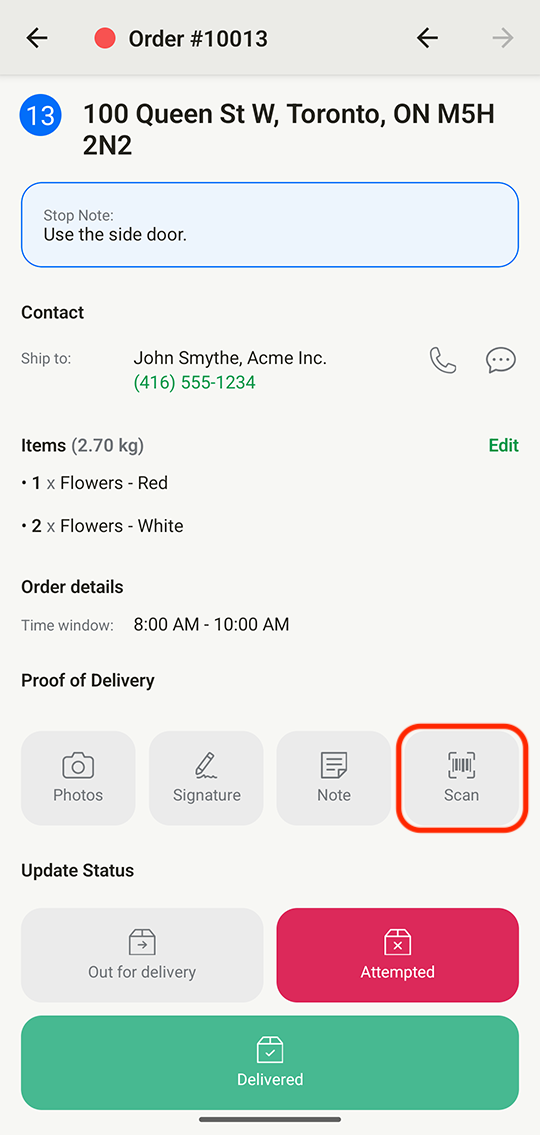
Barcodes generated by EasyRoutes and included on packing slips & packing labels can be scanned directly from the Proof of Delivery section of the mobile app when viewing an individual stop by tapping the Scan button:
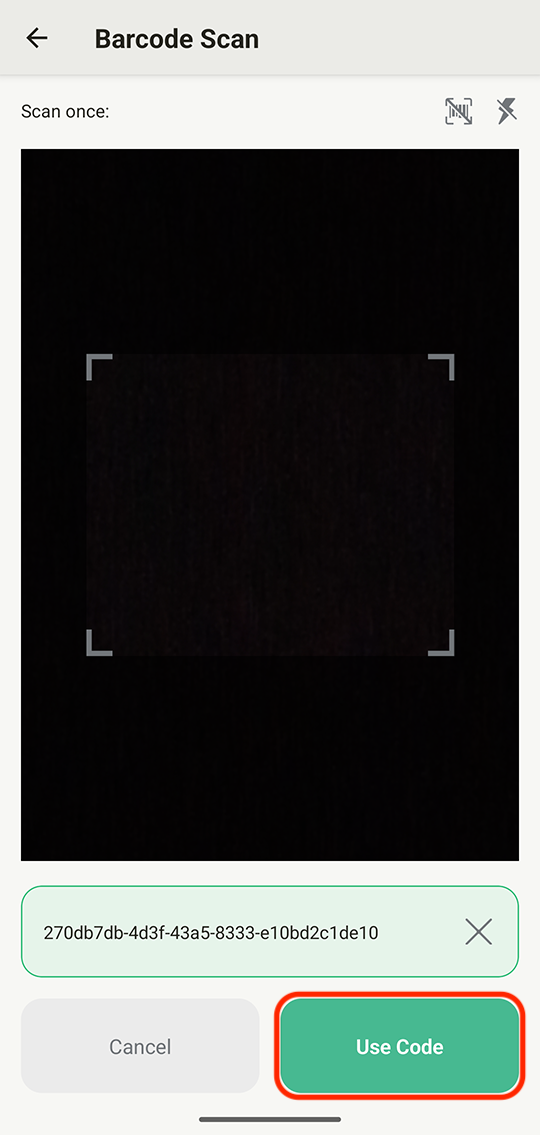
From the Add Barcode page that appears, tap the Scan button to activate the device's camera and scan any EasyRoutes barcode - scanned barcodes that match the stop they're attached to will display with a green background as shown below; tap the Use Code button once successfully scanned:
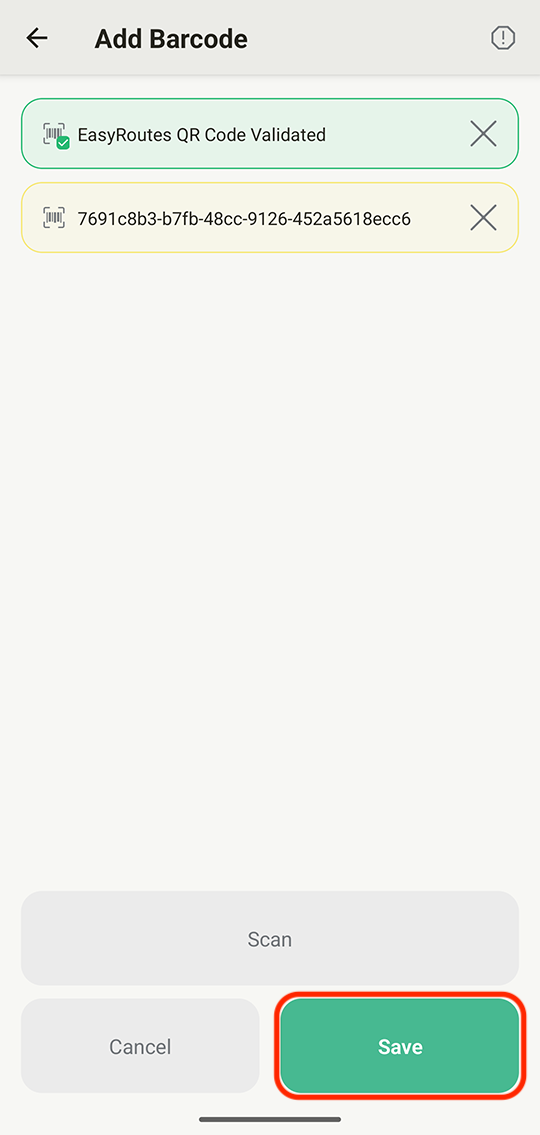
Once scanned, the Add Barcode page will also display any non-matching barcodes scanned in yellow - tap the Save button to confirm all barcodes scanned and return to the stop details page:
The value of any barcode scanned using this workflow will be stored as Proof of Delivery for future reference, and can be accessed from any Route page by clicking the note icon found in the Proof column for any stop:
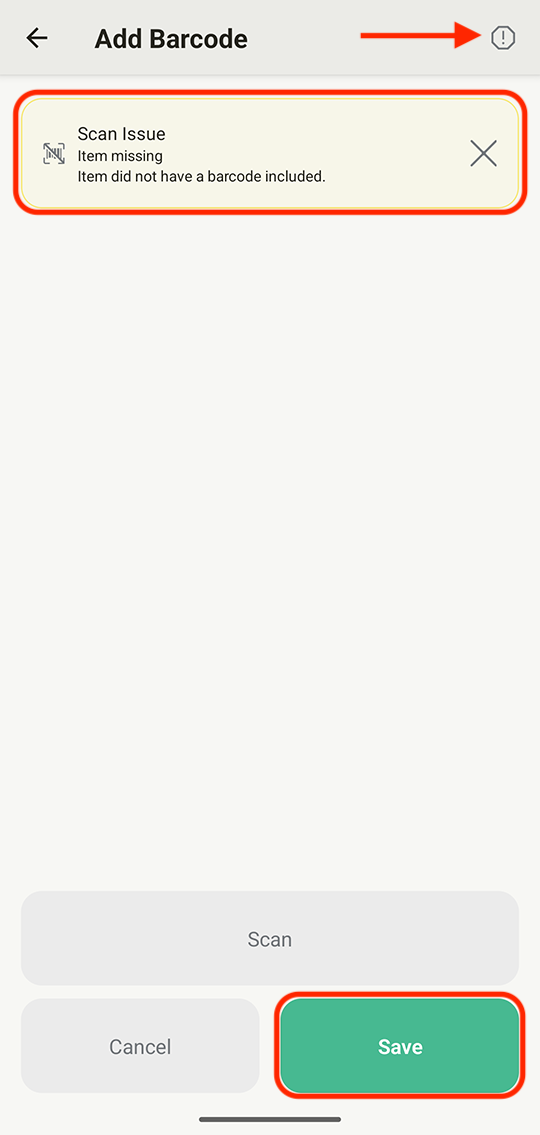
If drivers encounter any issues when scanning EasyRoutes barcodes, they can tap the alert symbol in the upper right-hand corner of the Add Barcode page, and input any relevant details before tapping the Save button - a scan issue report will be submitted instead of a barcode scan:
External barcode scanning
EasyRoutes' external barcode scanning feature is compatible with most standard linear barcode formats (Codabar, Code 39, Code 93, Code 128, EAN-8, EAN-13, ITF, UPC-A, UPC-E) and leading 2D barcode formats (Aztec, Data Matrix, PDF417, QR Code).
Barcodes can currently be scanned via both Driver Tasks and Proof of Delivery notes:
Driver Tasks

Enabling a Scanner input type Driver Task will prompt drivers to scan a barcode before completing each stop. As with any other task type, scanner input tasks can be made mandatory to mark a stop as Delivered and/or Attempted when configuring the task. To configure a barcode scanning driver task:
- From your EasyRoutes Orders page, access your active Route Options by clicking the Add/edit options button directly below the map display.
- Scroll down to the Driver tasks card, and click the Enable button.
- Within the Driver tasks card, click the Add new task button and configure as follows:
- Input a task name (for example, "Scan product barcode")
- Select "Scanner input" from the Type dropdown
- Optional: check the boxes for "Delivered" and/or "Attempted" if you wish to make barcode scanning a requirement in order to mark stops as Delivered and/or Attempted.

- Scroll to the top of the page and click the Save button to return to your Orders page.
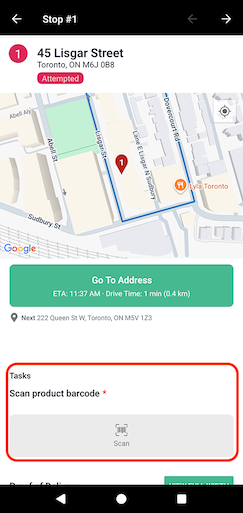
Any routes created with a scanner input task configured as described above will prompt drivers using the EasyRoutes Delivery Driver mobile app to scan a barcode when completing each stop:
Once scanned, product barcodes can be viewed from any Route page by clicking the checkmark icon found in the Tasks column for any stop. The Scanned checkbox will be ticked if the driver used their camera to scan a barcode; it will be unticked if the barcode was manually input instead:
