
How do I use EasyRoutes Delivery Driver?
Here's a step-by-step guide to using EasyRoutes' mobile apps to complete routes. Click any of the links below to jump to a specific section of this guide:
- Signing in to EasyRoutes Delivery Driver
- Receiving a route
- Accessing route inventories
- Starting a route
- Getting directions to stops
- Adding proof of delivery
- Updating stop statuses
- Finishing a route
Signing in to EasyRoutes Delivery Driver:
- Download the EasyRoutes Delivery Driver app for your device - from the App Store for iOS devices, or from Google Play for Android devices.
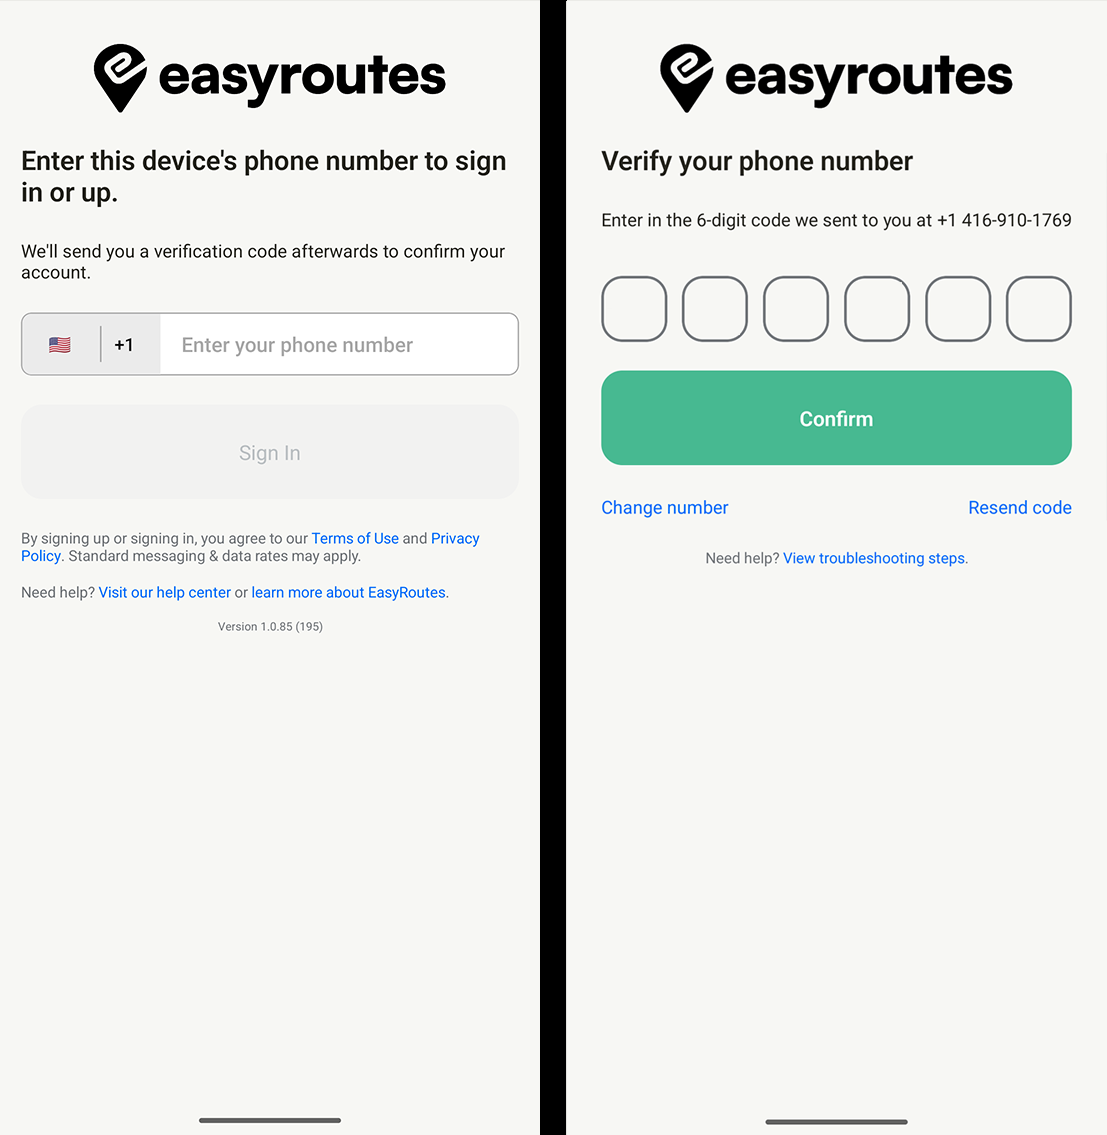
- When opening the app, enter your device's phone number and tap the Sign in button (shown below, left). We will then send you an SMS message with a verification code and you will be taken to a screen where you will need to enter that code and tap Confirm (shown below, right):
- Once your verification code is confirmed, you will be asked to create a driver profile if this is your first time signing into the app:

- Fill in the First Name, Last Name, and Email fields, and tap the Complete Signup button. This step is only required when opening the app for the first time.
- You'll be taken to the app's My Routes view where you can access any routes that have been dispatched to you.
Receiving a route:
When a business or a store that uses EasyRoutes creates a route and dispatches it to you, you will receive a push notification if you have enabled push notification permissions. Tap this notification to access the route directly:

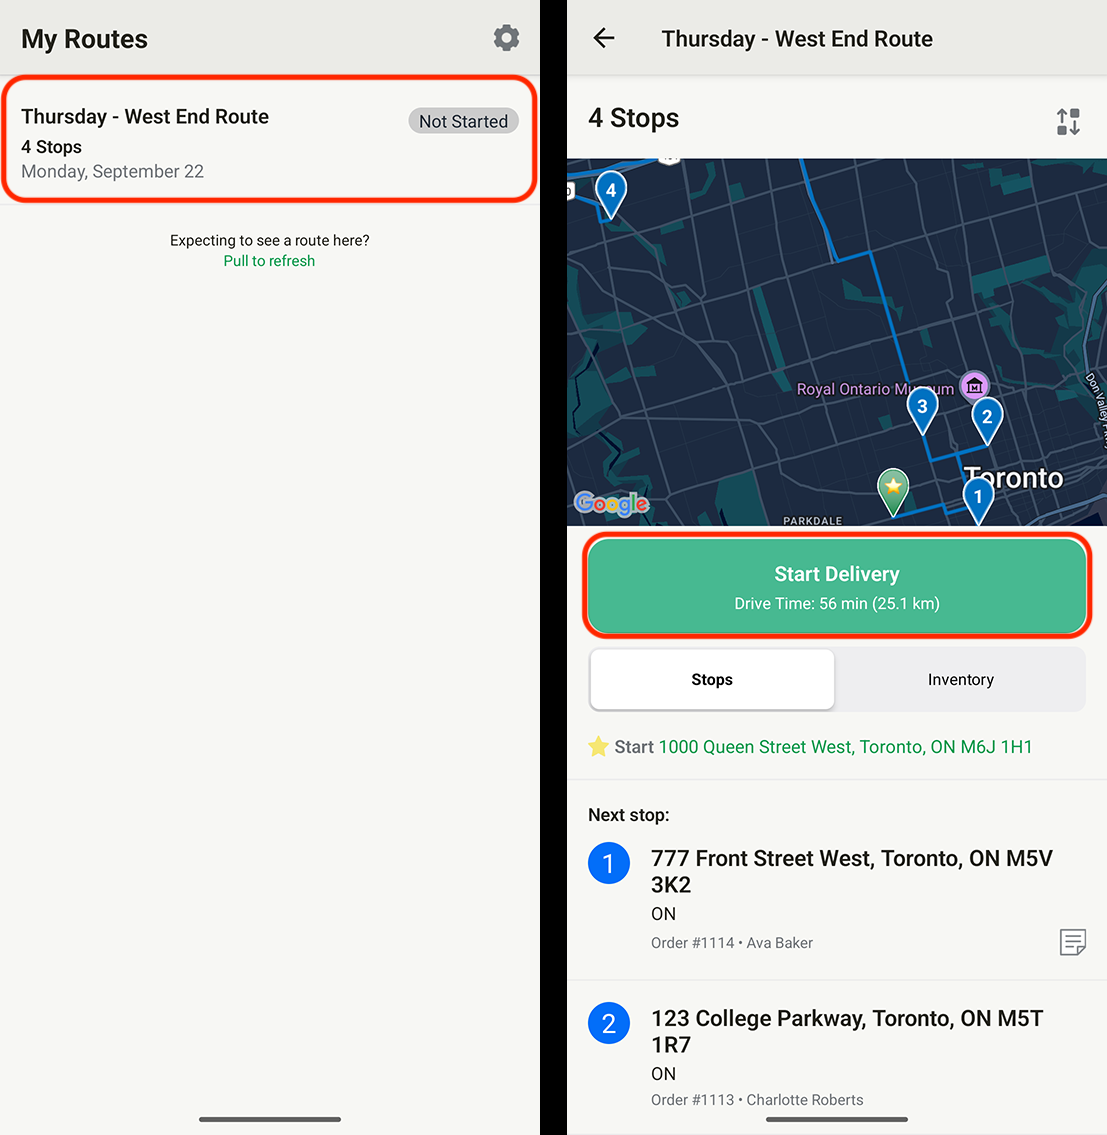
Any routes dispatched to you will also automatically be listed in the My Routes page found as soon as you sign in to the app (shown below, left). Tap on any listed route to access a summary of that route (shown below, right), and tap the Start Delivery button to begin this route:
You can access the list of all of your active, assigned routes within the mobile app once a route is assigned to you without opening a link or a message. The push notification is only to notify you that you have a new route, and the provided link is a shortcut.
If a route has been assigned and shared to you directly, but is not yet appearing in your list of shared routes, you can pull to refresh on the My Routes page after logging in to see all of your assigned routes.
Accessing route inventories:
EasyRoutes generates an inventory/packing list for each route. This inventory gives you an overview of every item you need to load before you head out on your route. Access inventory for a route by doing the following:
- From the My Routes home page in the app, tap on the route you'd like to access inventory for (shown below, left).
- Tap the Inventory button below the map (shown below, right):

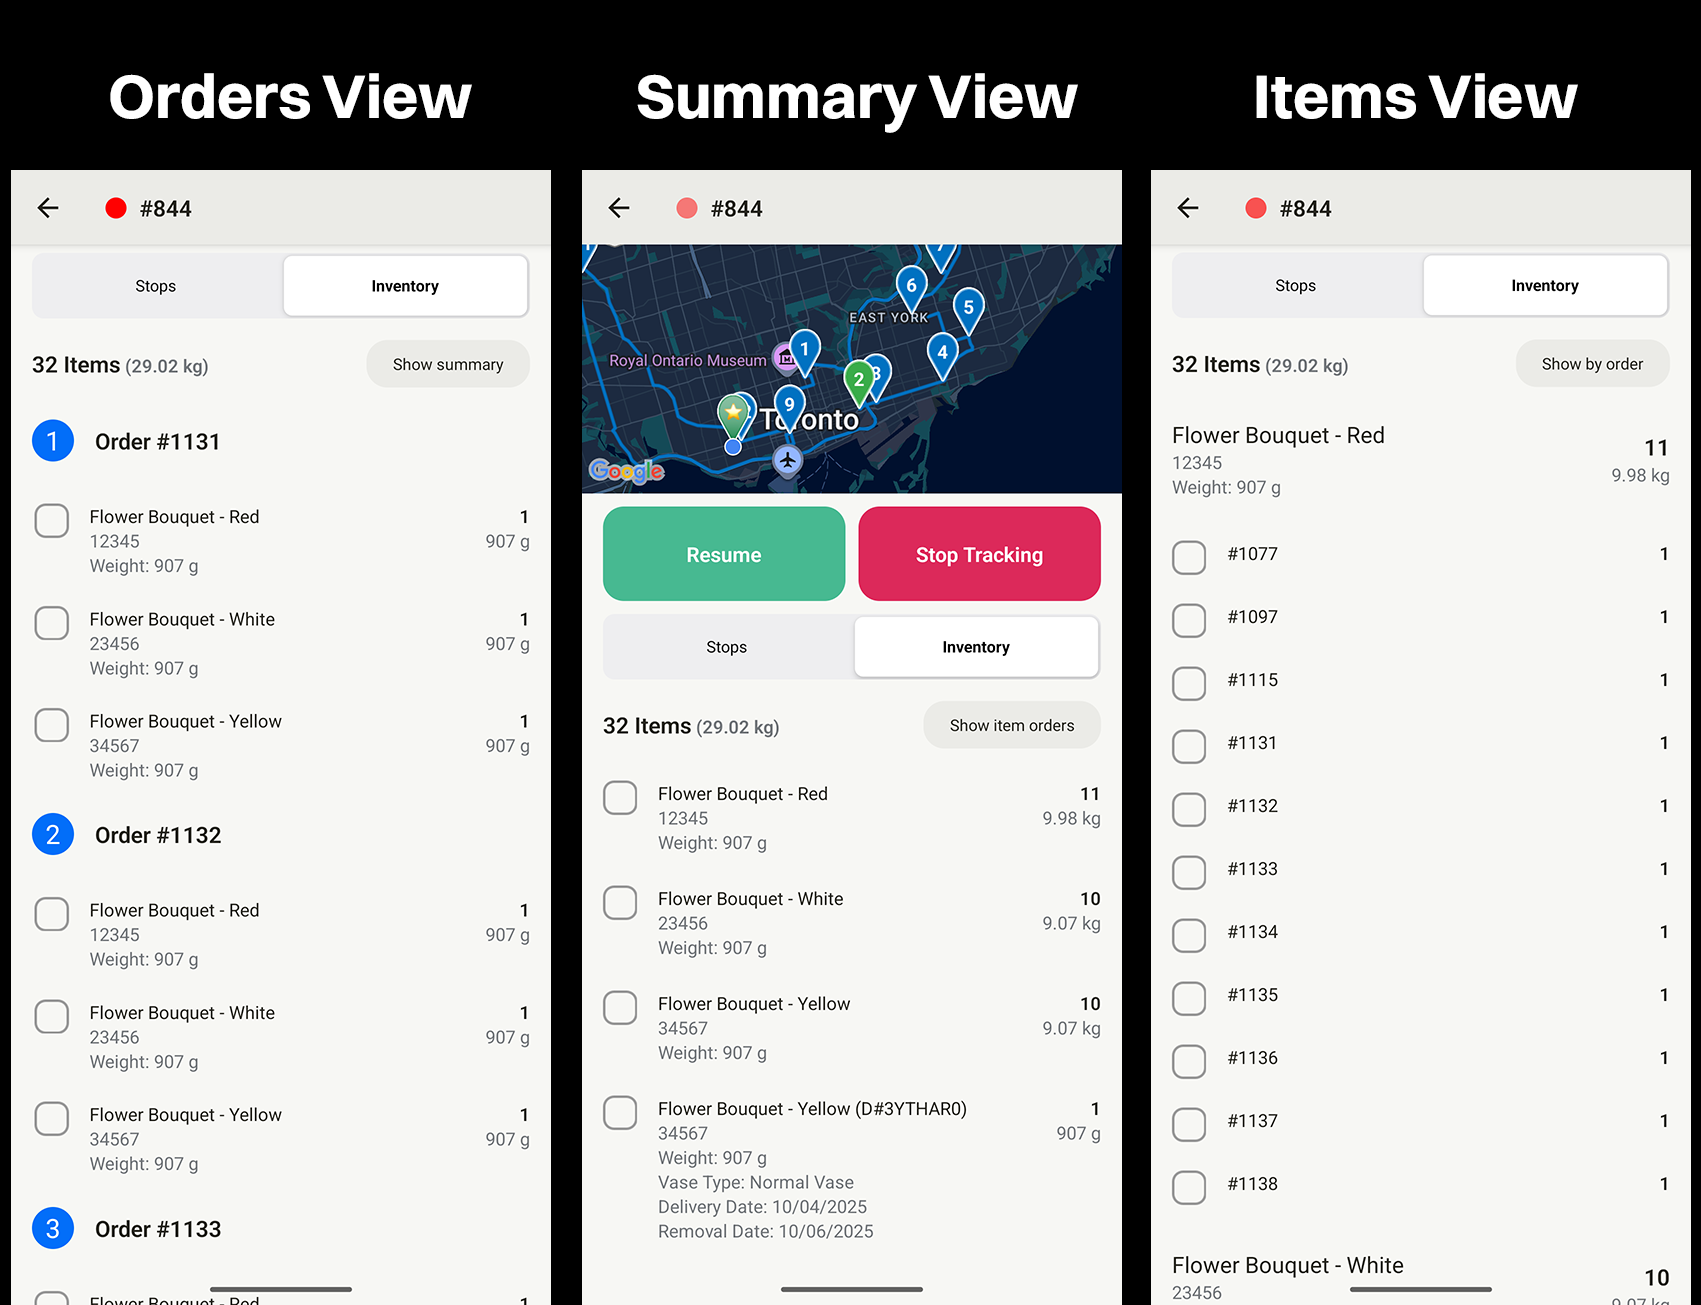
Three different inventory views are available to view:
- Orders View: the default inventory mode, displays each stop (in routed order) and the individual items and quantities required per stop - tap Show summary to switch to...
- Summary View: displays individual items and their quantities required for the entire route - tap Show item orders to switch to...
- Items View: displays a summary of each item required for the entire route, as well as the quantities of each item, and the stop or order it's associated with - tap Show by order to switch back to the default Orders View:
A checklist is provided as a helpful tool for packing if the driver app is used for packing a vehicle.
Alternatively, you can find the items for each individual stop inside of individual stop pages while completing your route:

Starting a route:
- From the My Routes page in the app, tap the View Route button for the route you'd like to start (shown below, left).
- Tap the Start Delivery button found below the map view (shown below, right):
- Tap the Start button to confirm that notifications may be triggered, and real-time tracking will be turned on:

The app will load the stop summary page for the first stop in your route.
Getting directions to stops:
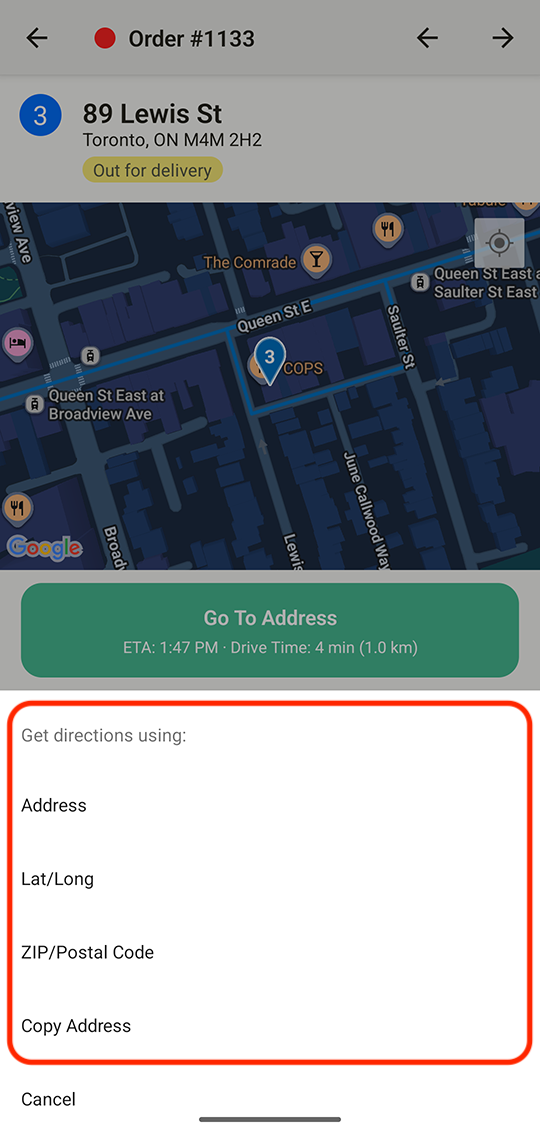
From any stop's summary page, tap the Go To Address button below the map to launch your preferred navigation app and get directions to this stop:
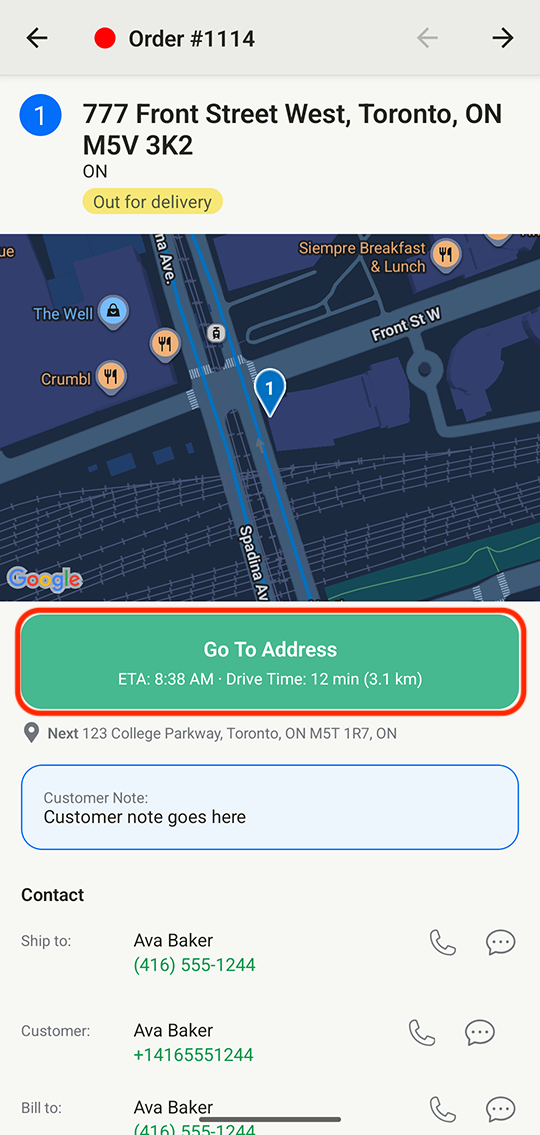
If you long press the Go To Address button, you can choose a different navigation mode for this stop (i.e. to navigate using latitude/longitude coordinates, or ZIP/postal code instead) or copy the stop's address to your device's clipboard:
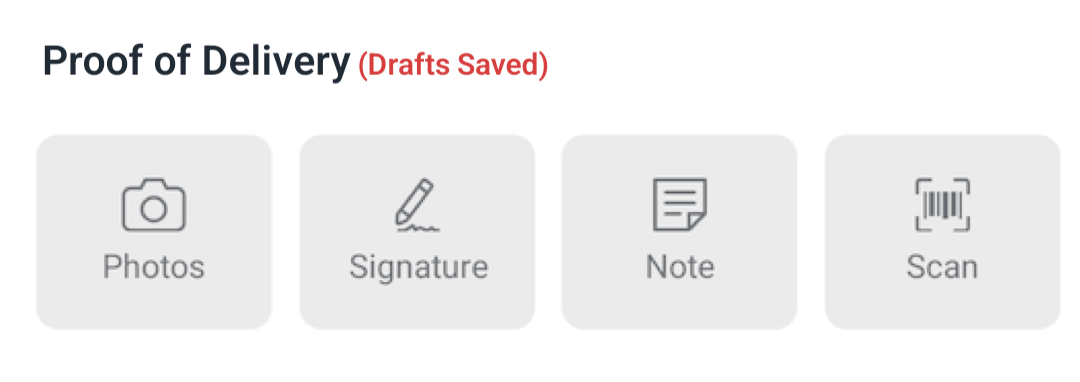
Adding proof of delivery:
You can attach photos, an eSignature, and/or a custom note as proof of delivery. To do so:
- When viewing any stop on a route, scroll down until you reach the Proof of Delivery section:

- Tap the button for the type of delivery proof you would like to attach and follow the steps provided.
- Tap the Save button.
Once your proof is uploaded, you will see it displayed on the stop page.
EasyRoutes can also save drafts of your proof of delivery photos that can be attached to the stop later. This is helpful when completing routes in locations with internet connectivity issues.
- Take proof of delivery photos as described above.
- Tap the Cancel button: you will be prompted with the ability to Save Draft:

- Tap Save Draft and you will now see that the stop has drafts saved:
- Once a draft is saved, you can tap the Photos button again and you will see your saved draft photos in your Add Photos screen.
- You can either try saving again by tapping Save when you have connectivity, or you will be prompted to Save Draft or Discard draft when you hit Cancel if you still have any draft photos.
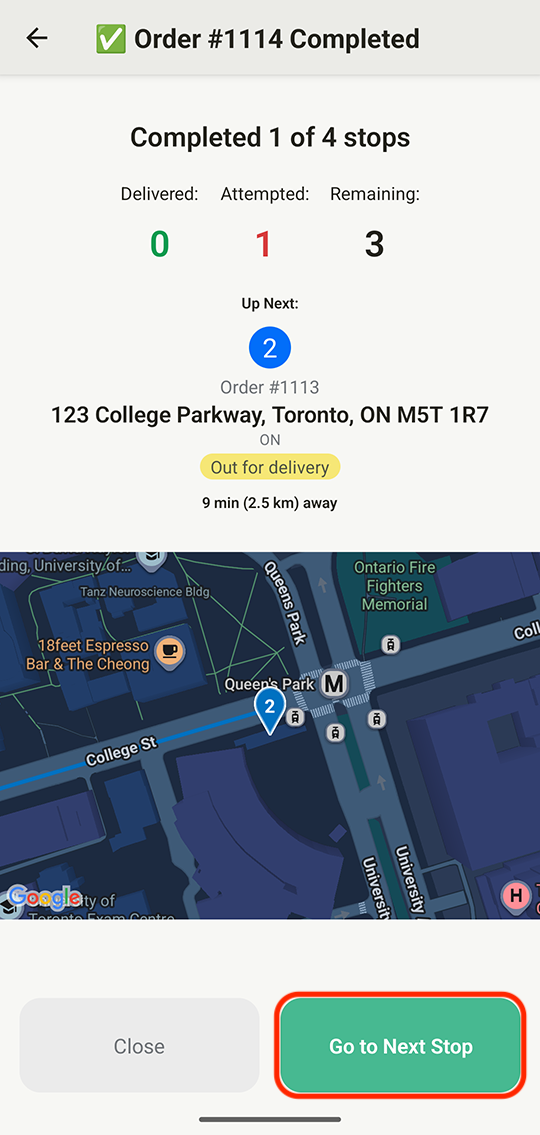
Updating stop statuses:
EasyRoutes allows drivers to mark stops as Delivered when completed successfully, or Attempted if the stop could not be completed successfully. To update the status of any stop while completing a route:
- When viewing any stop on a route, scroll down until you reach the Update Status section:

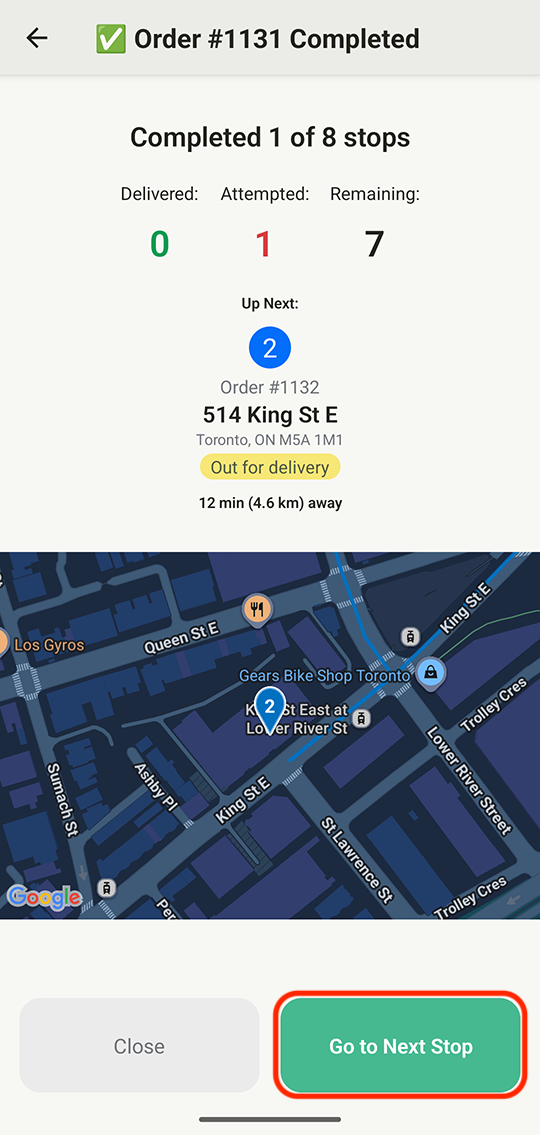
- If the stop was completed successfully, tap the Delivered button. An updated route summary will display - tap the Go to Next Stop button to continue your route:
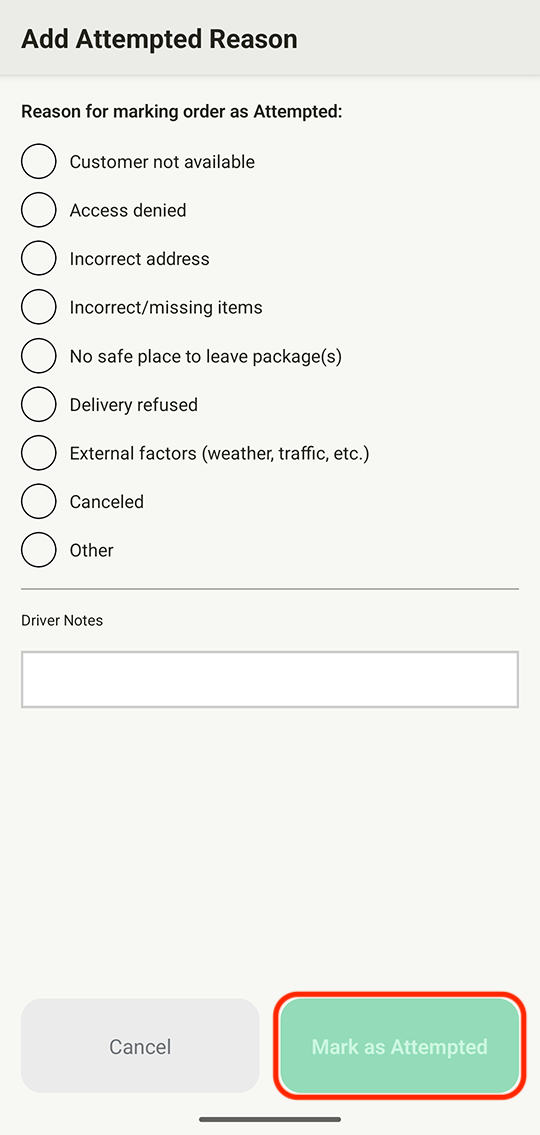
- If the stop was not completed successfully, tap the Attempted button. You'll be prompted to select a reason why the stop was unsuccessful, and optionally include a note, before tapping the Mark as Attempted button:
- An updated route summary will display - tap the Go to Next Stop button to continue your route:
Finishing a route:
Once the last stop in your route is marked as Attempted or Delivered, you'll be prompted to navigate to the route's end stop - often this is back to a warehouse location, or a driver's home base. To complete a route:
- Tap the Go to End Stop button displayed on the route summary page after completing a route's final stop (shown below, left).
- Use the Go To Address button to launch navigation to the route's end stop if required.
- Once you have arrived, tap the Mark Route as Complete button to complete your route (shown below, right):

A final summary for the completed route will display:
